Wednesday 21 September 2016

Low Relief Hotel Update……………….


Just a quick post to keep you up to speed. I had to work again this weekend to cover for one of my colleagues. Two weeks earlier than my usual shift, but on the plus side, it will be six weeks until I’m next in on a weekend. The biggest bonus was I could get on with the new T006c Low Relief Hotel from Scalescenes.
The front façade was next, and back to cutting out all of those windows, twice! Once for the main structure and once for the cover layer.
  
Once the cover layers are stuck to the base layers and the edges wrapped around the openings, it at this point the windows sills are put into position to finish off the openings.
  
Time to fix into position all of those windows into place and to put the curtains in place.
 
Once all three elements are complete, they all come together as one to make the front façade.


Believe it or not, this took me all weekend to achieve. Well, I did have to work after all.

Until Next Time………….
 

Monday 5 September 2016

Weekend Bonus Build…………….


Once every four weeks I have to work all weekend. This can be a bit of a chore, as nine times out of ten, there is more sitting around than actually doing anything productive. All is not lost however, because Scalescenes have just released a new model. It is the new T006c Low Relief Hotel. It would be rude not to have a bash at it, whilst sitting around waiting for wagons. It’s low relief and will sit to the back of any layout and be a very imposing feature next to a station building. I’m thinking that it may be able to be built twice and make it into an “L” shape, to go around a very imposing roof joist I have on my layout in the loft.  

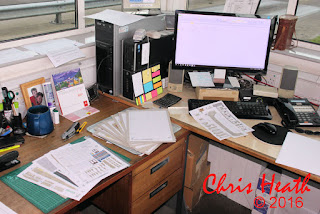
As you can see, my work space was set up more for building a model, than actually working.


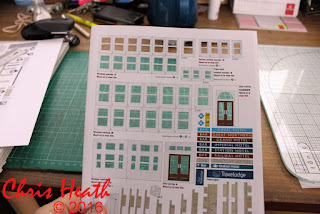
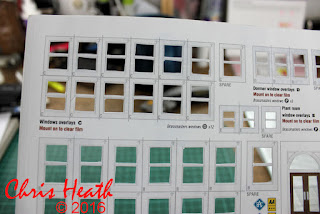
The first step was to cut out all of the windows. 91 separate windows or 232 individual cuts to be precise. Sore finger time I’m afraid. My wife Jak has a new plotting / cutting machine, and I was hoping that we would have it set up with the software, that would enable me to scan in the window sheet and cut the all out for me. But we couldn’t get it set up in time, so I had to cut the by hand.
 
Secondly, the floors and ceilings glued back to back, with the addition of an extra couple of layers to two of them, to form an upper and lower ledge. Cut the small internal walls out, and away we go building.


At this stage, there is two pillars to add to the main hall way. These are simply made by rolling the printed paper to form the column. But since I use self-adhesive labels, these are tricky to roll. So I used my trusty orange sticks (see earlier post). I just simply wrapped it around the stick.
 
 
On this kit, there is the addition of a photographic backdrop of the main staircase. This will be visible through the main front door.
Once the first set of walls are in place, It’s onwards and upwards.
I will just build this project at work. So it will be a few weeks before any progress will be seen.
Until Next Time…………….

Saturday 3 September 2016

Diorama Update...............


Here you go as promised, albeit a little late, the pictures of the row of ten T008 Low Relief Terraced Houses from Scalescenes, that I’m making for a 1950’s diorama. I know that there is a huge jump in the progress, but like I said in the previous post, I got a little carried away.
 
 
They will sit nicely with the row of eight T022a Terraced Houses. I’ve not decided on the final layout of the diorama yet but, I’ve got so many ideas running around my head. I think I need to jot down my ideas on a plan. The problem is, I think this diorama may become a bit bigger than what I intended it to be. I’ve been into the loft to see what I’ve got to go on the diorama, and I have got so many completed models, I may as well just make it on my layout. No, be strong, I will contain myself and build a small portable diorama.
Here are the two rows of houses sitting together for the first time. I’m not sure of the final positions yet, I just wanted to get a view of how they looked together.
   
Can I share with you a small tip I’ve found. I originally airbrushed grass onto the derelict gable end. I wasn’t quite happy with the final flat looking result, so I went off in search of something to use as grass. I found an old paint pad in my shed, and with a haircut and a bit of airbrushing, I’m pleased with the final result.
 
I think a small wall or a fence may be in order to finish it off.
Until Next Time................