Monday 22 April 2019

Finished Small Fishing Boat...............


Unfortunately as I said on my last post, I’ve lost the pictures of the construction of the wheelhouse. Try as I might, I couldn’t retrieve them from my SD card. Other than making another one, you’ll have to forgive me and trust me that it was an extremely easy build. Nothing that you haven’t seen me do on here numerous times before on other vessels.

So here it is in its final position.

Just some final little extras to go onto the roof. The roof rails and the life rings.
 
The deck hatch is fitted next along with some fish crates.
 
 
John at Scalescenes has cleverly fashioned a deck winch to add fine detail to the fishing boat.
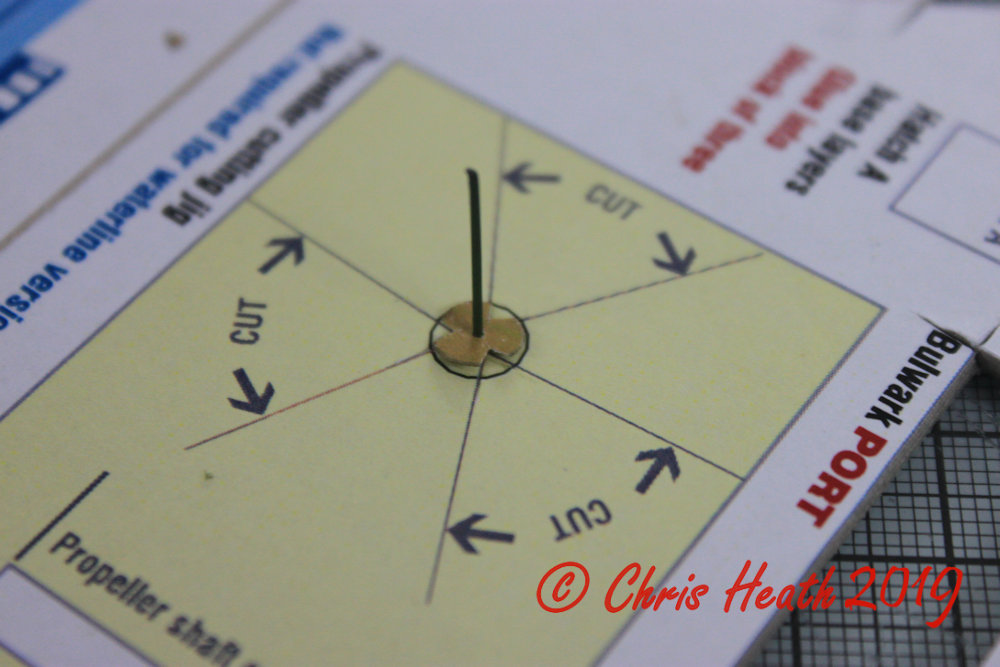
A supplied jig helps to bend and cut to the right length, a paper clip or as I’ve used, a piece of florist wire.
 

 A small winch is fastened to the top of the wire, and set into the side of the hull.


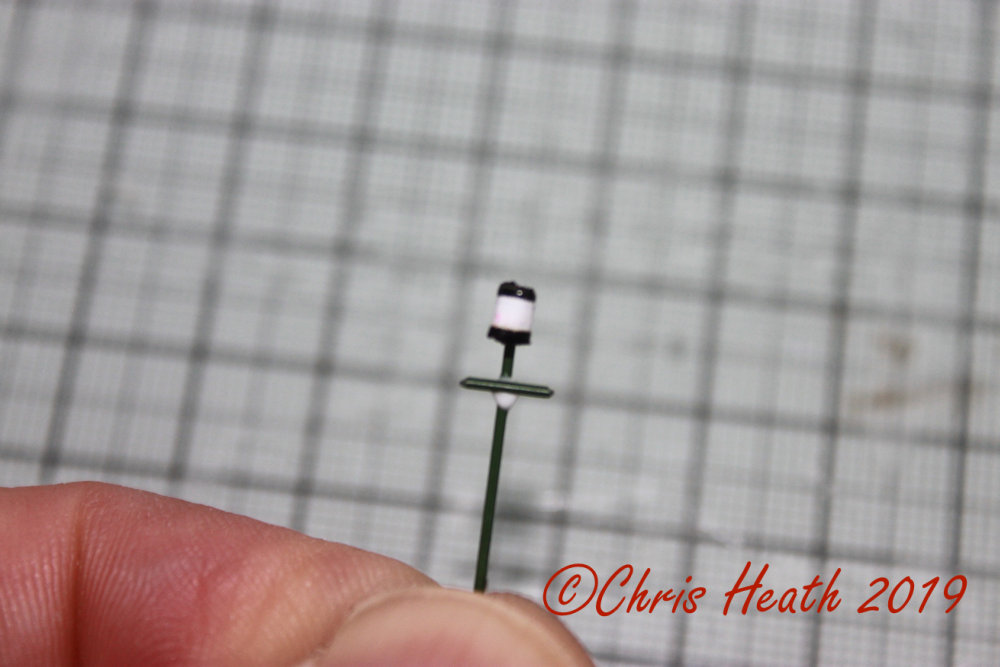
A quick mast made from the same florist wire, the addition of a mast light, and the registration number, completes the build.
Here it is in all its glory.
 
 
And with its sister boat.


I’ve enjoyed building these Small Fishing boats. I think that John will be using a similar hull design for numerous more small boats.
Until Next Time..........


Saturday 20 April 2019

Small Fishing Boat Pt.2..........


Apologies, I’ve been away longer than I thought. I wanted to show you by now, the finished T030d Small Fishing Boats from Scalescenes. But as always, work and life in general get in the way of modelling progress. These little boats shouldn’t take too long to build, but when you’re grabbing half an hour here and there, the days soon go by. Anyway let’s see some progress.

Following on from my last post, the bulwark planking is fitted next.
 
Next it’s time to wrap the hull with the cover layer. I cannot emphasise enough about taking the time to sand the hull smooth. Time taken at this stage will give better results. Any imperfections are greatly emphasised once the cover layer is applied. 
 

Compared to previous marine kits that Scalescenes have produced, the cover layer on this little gem go on a treat. I think John has just about cracked the perfect small hull design. It’s just a case of gluing the cover layer to the hull and wrapping and forming underneath.
 

Put your choice of name and home port on the stern cover next, and fix it in place. 


The propeller, yes the propeller is next. Conveniently made from the same size as a standard office hole punch.
 

A jig is supplied to form the correct spacing for the blades. Once cut out and a slight pitch made to the blades, a propeller shaft is fashioned from a simple cocktail stick. 


Time to cover the lower hull. First the keel cover. This also covers the majority of the propeller shaft Then the hull underside. Taking time to accentuate the planking.


Next fit the bilge keels to the hull.


Carefully fit both of the fenders next. Note there are port and starboard pieces. Don’t panic once these are in place when you realise that they are too long. Just wait until the glue has dried and cut the neatly to length.
 
Next fit your choice of forecastle deck and matching capping rail and stern cover into position. Sorry, I forgot to take a picture of the stern cover. You will see it later, a few steps from now.


It’s time now to decide whether to have the wheelhouse at the Aft or Forward position. There two different versions depending on which you choose. I’ve chosen Forward for this one.

A simple box construction, forms the basic structure. Make sure to glue the sides as shown here, so that everything will match up.
 

The back and roof are next, complete with marine VHF radio. Squarely glue using a block, or use the supplied jig to keep the roof perpendicular. I also forgot to show you the instrument panel and steering wheel in situ.
 

Now I have a problem. My memory card in my camera has decided not to write a half dozen or so images to itself. So I’ve lost the progress of the wheelhouse build. I have pictures of the finished wheelhouse in place, but not how I built it, sorry. I think I need a new SD card.

I will post my progress over the next couple of days. Once I’ve sorted out my camera.


Until Next Time..........