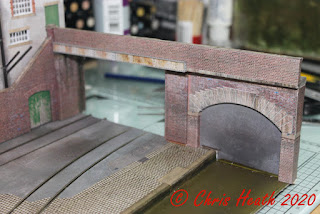
Here we go with the last instalment of the Scalescenes
LY02 Canal Wharf Box File. I’ve just the bridge to complete and the back scene
to glue on, then it will be finished.
So let’s get a start. First of all prepare the edge of
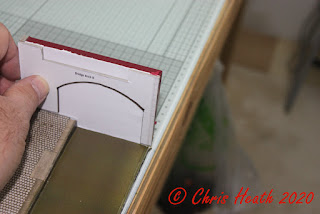
the box where you cut the opening, by adding an abutment.
 Next, cut out and size to fit, the Arch B section. But
don’t glue it into position just yet. You will need it to use as a template for
the next layer.
Next, cut out and size to fit, the Arch B section. But
don’t glue it into position just yet. You will need it to use as a template for
the next layer.

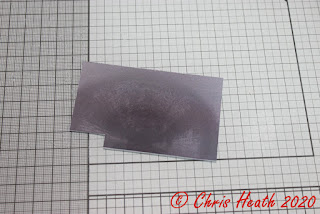
 Glue the background of the tunnel onto the box next.
 Cut out the Arch A, and using Arch B resize to fit. Then
glue together.
Cut out the Arch A, and using Arch B resize to fit. Then
glue together.
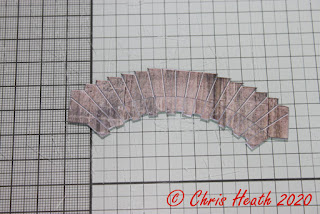
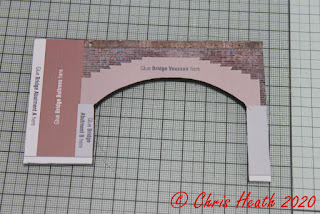 Next cut out the Voussoir Stones (Arch to you and me).
Then glue to the arch and wrap and glue the tabs around.
Next cut out the Voussoir Stones (Arch to you and me).
Then glue to the arch and wrap and glue the tabs around.

 Glue the abutment B and C cover layers next.
 Then glue abutment A cover layer next, but don’t wrap all
the way round just yet. This will get glued once the arch is glued in place.
Then glue abutment A cover layer next, but don’t wrap all
the way round just yet. This will get glued once the arch is glued in place.
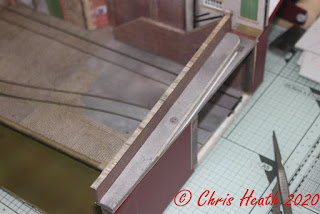
 Glue the arch into place on the box. Then wrap around the
arch A cover layer around the box file.
Glue the arch into place on the box. Then wrap around the
arch A cover layer around the box file.

 Cut out the buttress and cover with its cover layer. The
glue in place.
Cut out the buttress and cover with its cover layer. The
glue in place.
 Cover the pavement base layer with its cover layer.
 Now cut out the Deck section and glue the pavement on
top.
Now cut out the Deck section and glue the pavement on
top.

 Cut out and glue the inner and outer parapet walls
together. The glue the onto the deck section. Making sure to keep the printed
wall to the inside.
Cut out and glue the inner and outer parapet walls
together. The glue the onto the deck section. Making sure to keep the printed
wall to the inside.


 Next cut out and glue the Parapet wall cover layer into
place, and then wrap underneath the deck.
Next cut out and glue the Parapet wall cover layer into
place, and then wrap underneath the deck.
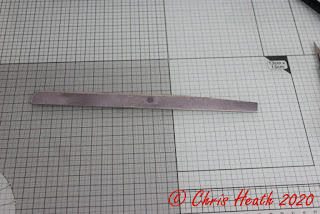
 This will now give the reference point to where to fit
the Bridge girder.
This will now give the reference point to where to fit
the Bridge girder.
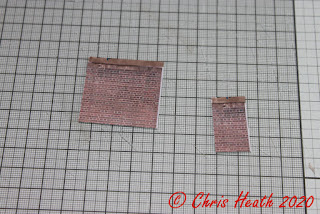
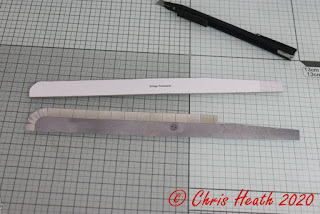
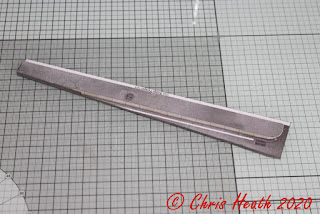
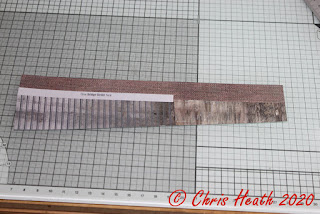
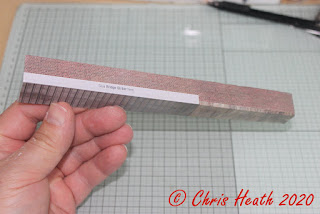
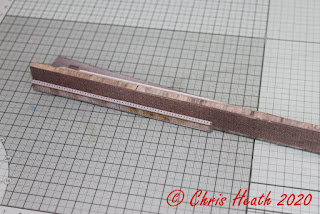
 Cut out the girder edges and the parapet coping, and glue
in place.
Cut out the girder edges and the parapet coping, and glue
in place.
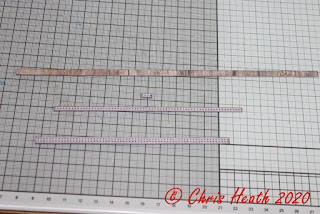
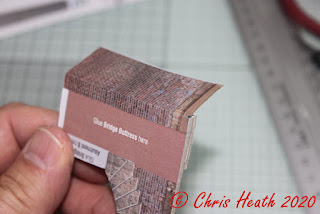
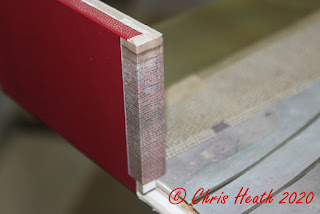
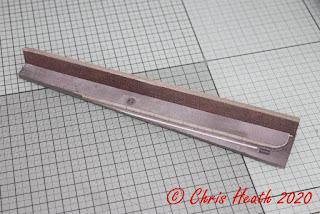
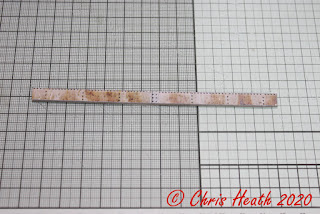
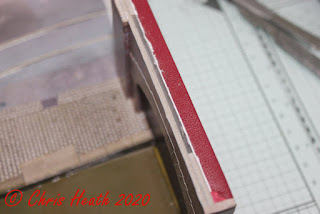
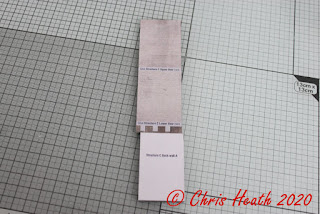
 Next, make sure that your bridge fits in place first, then
set aside. Then cut out the locating tab. Make sure that it sits in the
locating slot snuggly. If it is too tight, carefully sand down the leading
edge, so that it locates easily. Place it within the slot, but leave it
slightly proud. Don’t push it all the way in. Run a line of glue along the top
edge. Now carefully place your bridge in place over the locating tab. Let the
glue set and then carefully remove the bridge section. The locating tab should
now be in fixed place under the bridge section.
Next, make sure that your bridge fits in place first, then
set aside. Then cut out the locating tab. Make sure that it sits in the
locating slot snuggly. If it is too tight, carefully sand down the leading
edge, so that it locates easily. Place it within the slot, but leave it
slightly proud. Don’t push it all the way in. Run a line of glue along the top
edge. Now carefully place your bridge in place over the locating tab. Let the
glue set and then carefully remove the bridge section. The locating tab should
now be in fixed place under the bridge section.


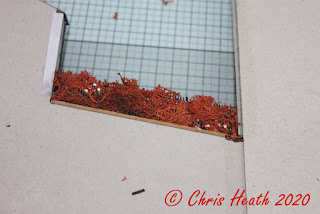
 Just the back scene and a little autumn foliage to add to
the rear of the fence, and that is it done.
Just the back scene and a little autumn foliage to add to
the rear of the fence, and that is it done.
 I’ve enjoyed this kit, as it has a few new construction
techniques. It’s taken me a little longer than I had anticipated, as I had to
return to work. But overall, I’m very pleased with it.
I’ve enjoyed this kit, as it has a few new construction
techniques. It’s taken me a little longer than I had anticipated, as I had to
return to work. But overall, I’m very pleased with it.


 I think that I’ll build a couple of the buildings again,
now that I have grasped the construction techniques, and add some lights.
Until Next Time……
I think that I’ll build a couple of the buildings again,
now that I have grasped the construction techniques, and add some lights.
Until Next Time……

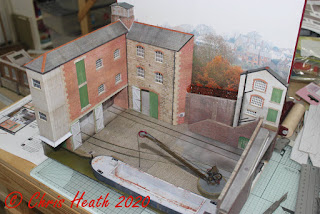
I have finally managed to get to do the next instalment,
of the LY02 Canal Wharf Box File from Scalescenes. Since having to return to
work, I have struggled to find the time to get into the loft to build this
section. But I have managed to complete Structure C at long last. Here goes. Firstly,
offer up the back wall against structure B, to determine the height to trim.
 Once trimmed, glue the down pipes to the edges, then set
aside for now. You will come back to this later in the build.
Once trimmed, glue the down pipes to the edges, then set
aside for now. You will come back to this later in the build.

 Next glue the two backwalls B and C together and wrap the
cover layer around the bottom.
Next glue the two backwalls B and C together and wrap the
cover layer around the bottom.

 Next, cut out the floor sections and glue back to back.
Now be careful to take note of the orientation of these pieces, the white
section is not centred in one of them, and the slight cut out in the other.
This will become apparent shortly.
Next, cut out the floor sections and glue back to back.
Now be careful to take note of the orientation of these pieces, the white
section is not centred in one of them, and the slight cut out in the other.
This will become apparent shortly.

 Next, cut out the side wall B, and using the down pipe as
a guide, trim to the same height.
Next, cut out the side wall B, and using the down pipe as
a guide, trim to the same height.

 Next, glue the back wall to the side wall B, along with
the floors. Make sure you do not do as I did and manage to glue the bottom
floor the wrong way round.
Next, glue the back wall to the side wall B, along with
the floors. Make sure you do not do as I did and manage to glue the bottom
floor the wrong way round.

 Next, turn over and glue the side wall B cover layer in
place.
Next, turn over and glue the side wall B cover layer in
place.
 Cut out the side wall A base layer and cover layer, then
cut out the window and door apertures. Glue the two together.
Cut out the side wall A base layer and cover layer, then
cut out the window and door apertures. Glue the two together.

 Then wrap and glue the window and door openings around.

 Fit the sills next.

 Next, fit the windows. I love these Scaleglaze windows.

Time to fit the doors in place next. Be very careful to
make sure that the door is central, because if you d0 what I did, the front would
not fit in place. Just check fit it over the gap in the floor before the glue
dries. If you do not, like me, you will have to alter it to make it fit.


 Next, glue the side wall A squarely to the floor section.
 Right, onto my next dropped clanger! Cut out and glue
together the two centre walls. Then glue it in place.
Right, onto my next dropped clanger! Cut out and glue
together the two centre walls. Then glue it in place.
 Do you see my deliberate mistake? The floor is round the
wrong way. Never mind, break out the coloured markers.
Do you see my deliberate mistake? The floor is round the
wrong way. Never mind, break out the coloured markers.
 Next, glue together the floor beams back to back. Then
glue the in position under the floor.
Next, glue together the floor beams back to back. Then
glue the in position under the floor.
 Next cut out and glue the internal side wall into
position.
Next cut out and glue the internal side wall into
position.

 Then wrap the cover layer around.

 Cut out and glue together front walls A and B.

 Then glue into position on the main building.
 Once in place, cut out the front wall cover layer and
wrap and glue around.
Once in place, cut out the front wall cover layer and
wrap and glue around.

 Cut out and glue the door and the door rail into
position. Don’t forget to colour the edges.
Cut out and glue the door and the door rail into
position. Don’t forget to colour the edges.

 Now it’s time to add the down pipe section. Making sure
to fix it centrally to reveal two down pipes, front and back.
Now it’s time to add the down pipe section. Making sure
to fix it centrally to reveal two down pipes, front and back.

 Cut out and glue in place the front internal C wall.
 Time to make some baton doors. Front, back and batons,
simple but effective.
Time to make some baton doors. Front, back and batons,
simple but effective.

 Once completed, glue the straight onto the main building.
 Next is the hoist housing. Cut out the left and right
walls and glue the cover layers over.
Next is the hoist housing. Cut out the left and right
walls and glue the cover layers over.

 On the back wall, make sure to adjust to fit the box
file.
On the back wall, make sure to adjust to fit the box
file.
 Cut out the floor sections and glue back to back.
 Cut out and glue the hoist front wall cover layer, then
test fit to make sure it fits.
Cut out and glue the hoist front wall cover layer, then
test fit to make sure it fits.

 Then add the windows.

 Glue the walls and floors together to make the hoist
structure.
Glue the walls and floors together to make the hoist
structure.
 Then once complete, glue it to the main building.
 Fine detail next. The side wall batons, awning supports
and awnings.
Fine detail next. The side wall batons, awning supports
and awnings.


 Onto the roof next. Make up the two blocks that will make
the transition pieces between structures A and C.
Onto the roof next. Make up the two blocks that will make
the transition pieces between structures A and C.

 Next, cut out the ceiling / gutter base layer and glue
the cover layer around it, the test fit it and glue into position.
Next, cut out the ceiling / gutter base layer and glue
the cover layer around it, the test fit it and glue into position.


 Cut out and make up the roof supports next.

 Cut out and tile the main roof, as with all scalescenes
kits.
Cut out and tile the main roof, as with all scalescenes
kits.


 Test fit and glue the roof in place. Then we are nearly
there.
Test fit and glue the roof in place. Then we are nearly
there.
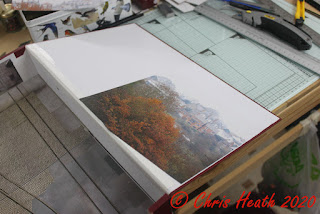
 Finally, glue the background to the box file,
 then try all the building together.

 That’s it for this section. Just the bridge to do now.
Until Next Time………
That’s it for this section. Just the bridge to do now.
Until Next Time………


