Sunday 3 February 2019

Finished Industrial Box File……….


That’s it, all done. I’ve completed the Scalescenes LY01 Industrial Box File. Before I show you the final set of pictures, there was a couple of additional small details to add.
There’s a pipe to run along the side of the conveyor. In the kit this is made by rolling a sheet into a simple tube, then cutting a 45 degree angle with the aid of kit built cutting jig. However, I had a piece of dowelling at hand, so it was easier for me to use this. This created a challenge to recreate the pipe’s rusting effect. Time to break out my stash of markers. I was quite pleased with the result.


The supplied back scene is added next. Simple two pieces.


And that’s it, complete.


Quick tip. Get yourself some Rare Earth Magnets. These strategically placed in and around the kit, will hold the elements and the lid in place.  


Next, I think it will be some small fishing boats, to add to my ever growing marine fleet. (Once Scalescenes get them released)

Don't forget you can get all of your Scratch Builders Yard Texture Sheets by following the link. Fantastic value at half the price of the full range. Scratch Builders Yard Texture Sheets
Until Next Time……….


Friday 1 February 2019

Industrial Box File. The Final Push………


The finish line is in clear sight now. Not much more to do. The next part to this project is the Plant room, Platform and the Conveyor.
Not much I can tell you about the plant room, as it is just a simple two sided piece with a cover layer to fit in the corner of the box file. Along with a retaining wall, that finishes the corner.


Next is the platform that runs along the front of the Box File. Again, not much to describe with this. It’s just simply platform supports with the platform on the top.  


Before the platform top goes into place, there are some steps to put in place. These are made simply by covering increasingly shorter steps and gluing them on top of each other, making sure that they are square, to form a staircase.


These steps are behind a retaining wall that runs half of the length of the platform. When I was cutting out the cover layer for the retaining wall, I managed to rip the corner off the bottom of the wall. I could of just printed off a second cover layer, because I could with Scalescenes kits, but I thought I would just weather the bottom corner to disguise the imperfection.
 

Once the stairs are glued into place, the platform and the retaining wall can be checked and finally fitted into place. Make sure that if you need to shorten the length of the platform, take it from the narrower lefthand side.
 

The conveyor is next. This is built sturdily with a base layer with a spine up the middle and ribs to support the walls. Please be aware that when you apply the cover layer to the underside of the conveyor, the cover layer is wider than base. I very nearly cut it to size to fit the base, but it actually covers the walls once these are put in place.


Once the wall are in place it’s time to cover the walls with your chosen siding. There are three different options to chose from.


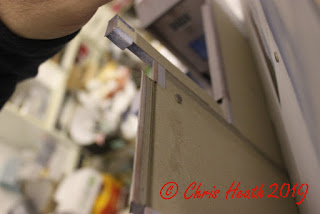
Make sure to expel any air bubbles. Thanks to my Grandson Jack for taking this action shot. He is my self proclaimed professional photographer.


The roof is next.


And that is It, apart from some fine detail. There is a pipe to fit along the length of the conveyor, and handrails to fit. Once these have been fitted, I’ll post the final result.

Until Next Time………