Tuesday 31 March 2020

Country Pub Revisited Pt.2………….


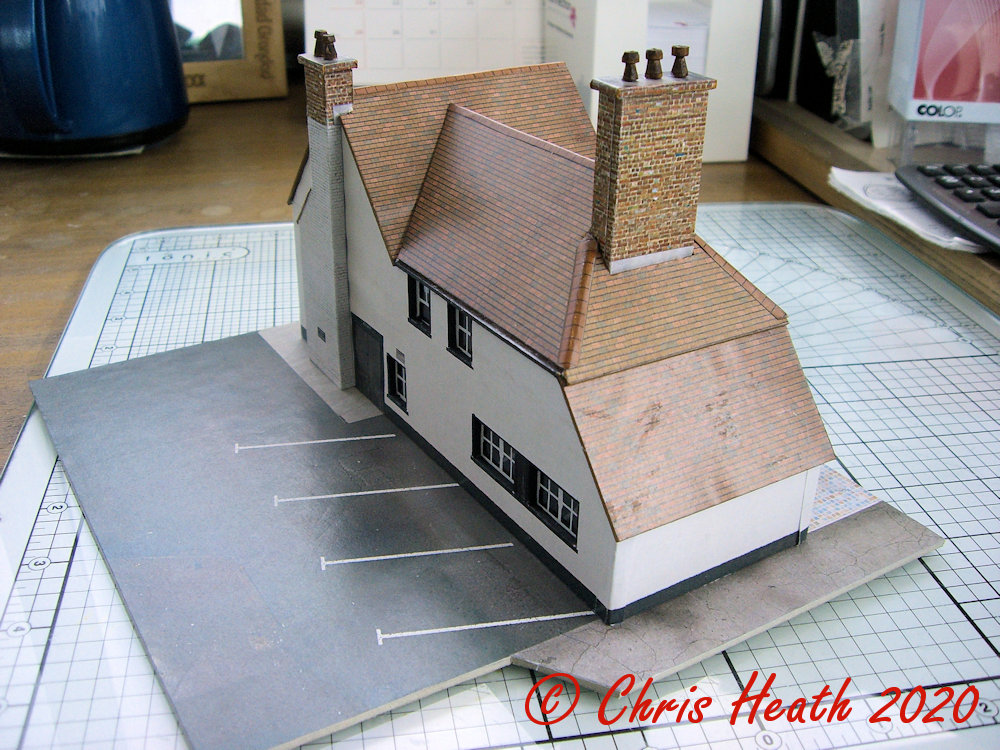
As promised, here is the finished post about the T011 Country Pub from Scalescenes. I’ve cracked on and completed the kit today. So here is how I got to the end.

I left the last post at the stage of the roofs been added.

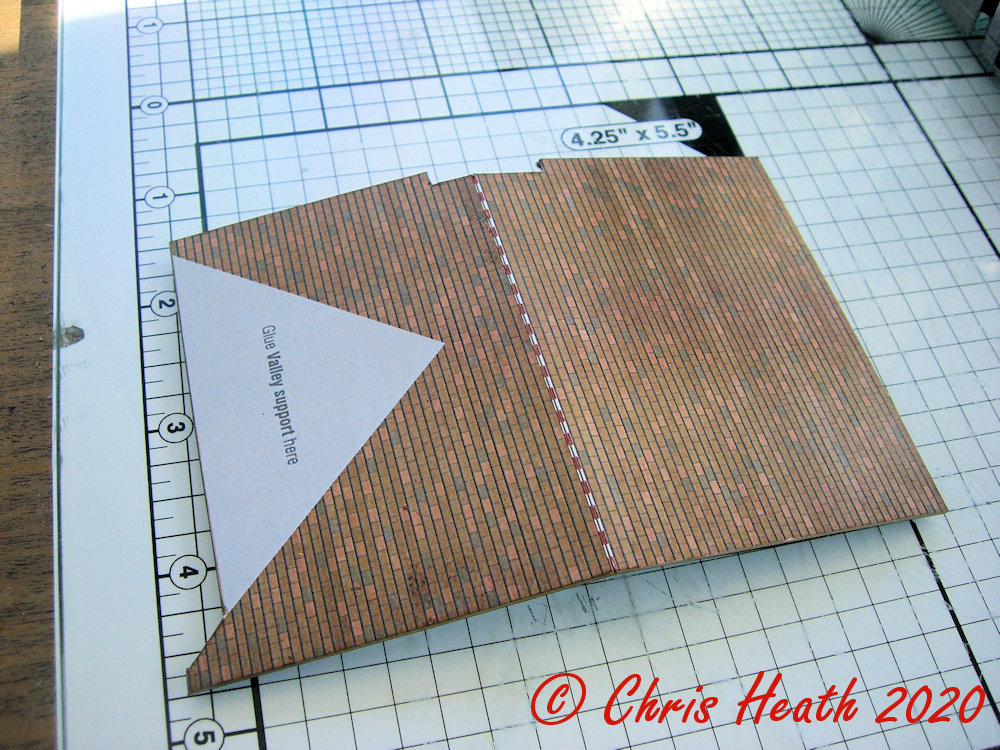
The next stage is to add the ridge tiles. Make sure to use a marker pen to colour the raw edges, and fold the ridges tiles along the length. This will help the stay in place once glued to the ridge.


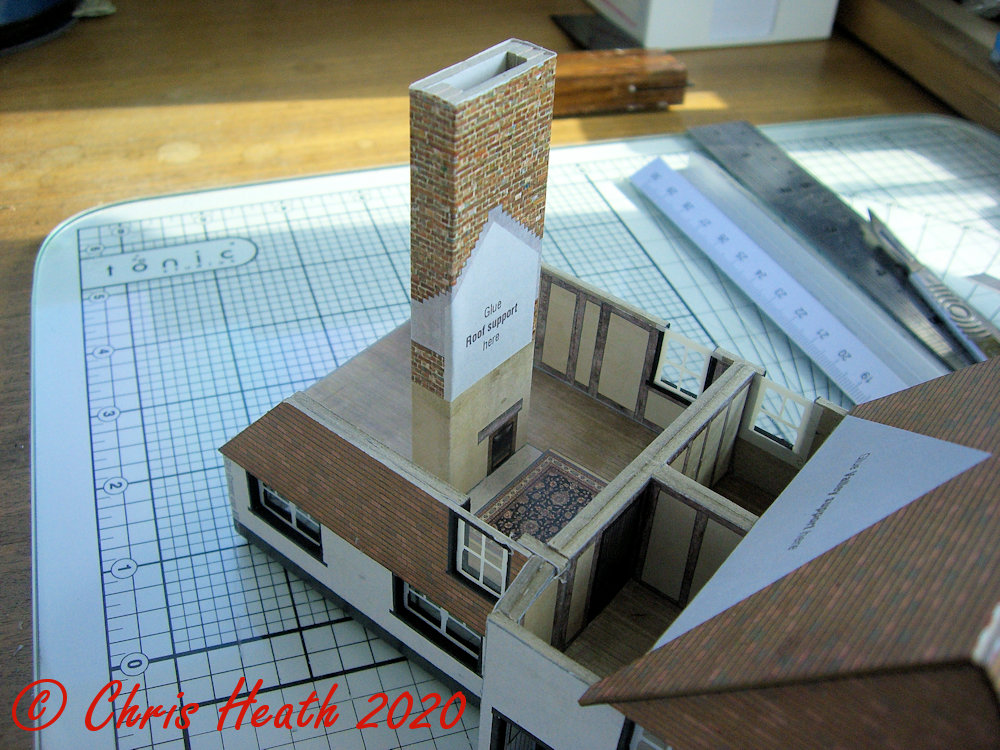
Next comes the chimney capping. A simple 2mm base and a cover layer.


All of the corner covers next, to cover the raw edges.
 

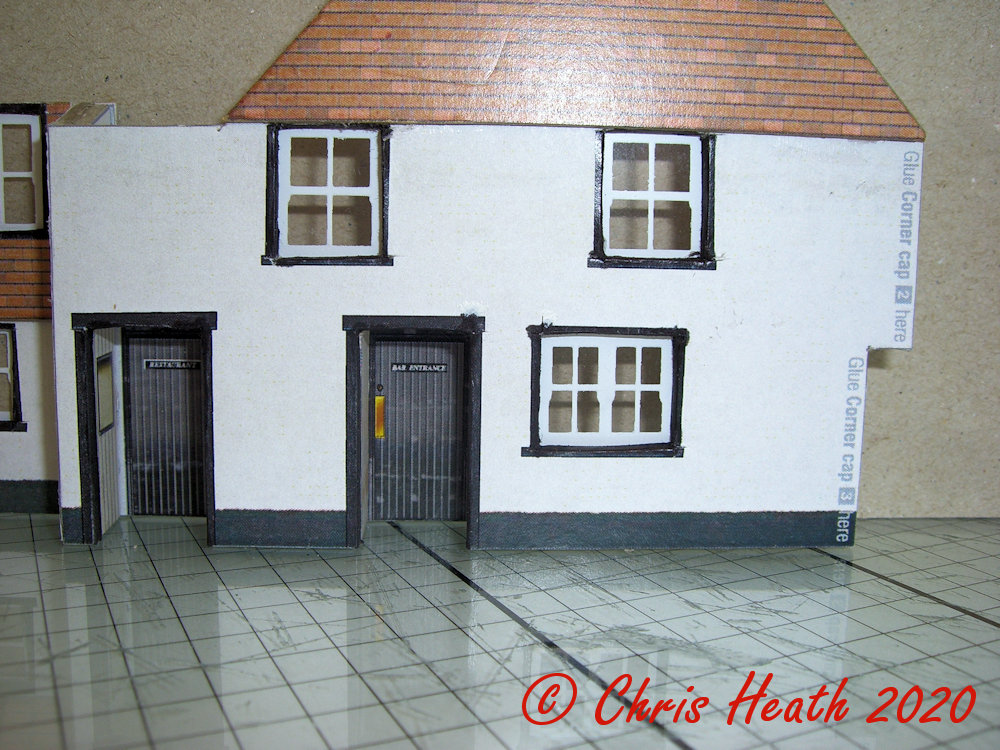
A couple of ceilings for under the porch way doors. Also giving a small canopy to boot.


Add the signage, and that’s it. Or so I thought.


I might as well put some chimneys on. I done a post a while ago about how I make my chimneys. Just in case you missed it, this is how I fashion a chimney pot.

Firstly, start with what is called an orange stick. These are what women use to manicure their nails. I got mine off of that well known auction site. I didn’t want to endure the wrath of my wife if she caught me using hers!


Using a sharp blade, make a cut about 2mm from the end, but don’t go all of the way through. Next score a line about 4mm from the first cut, and with your sharp knife, cut away from the score line up to the cut line. Forming a cone shape. Once this is done, cut the finished pot off the orange stick.
 

I colour mine with an alcohol marker.


Then add them to your chimney stacks. Simple!


And there it is. A complete Country Pub.


Roll on the new Box File Kit.


Until Next Time………..

Saturday 28 March 2020

Country Pub Revisited.........


Right, let’s get back to this Blogging lark. It’s been a tough six months for the Heath family, what with family problems, family health issues and the passing of my dear Mother. Blogging has been the last thing on my mind. I have however, been building the odd Scalescenes model when I’ve had the chance. Just to keep me sane more than anything. But like I said, Blogging about, couldn’t have been further from my mind. But now that things are returning to something more like reality, let’s build a model and blog about it. 

Now, along with countless others, I’m eagerly awaiting the latest release from Mr Wiffen at Scalescenes. The much anticipated new Box File Kit. But before that is finally released and I can my teeth into it, let’s get myself back into the swing of things with a nice easy kit. 

I’m going to revisit one of the first kits I made, and where this journey I’ve been on with Scalescenes first started back in 2010. The T011 Country Pub.

This was the first kit I purchased after I’d built the freebies. Unfortunately, way back then, I’d just started this blog and the only pictures of the Pub, were of it completed. So to do it justice, and show how it all goes together, here we go. 

The first big difference between then and now, is that there are now available a range of windows that compliment the kit. These are from the same company that produce the downloadable kits, and are called Scaleglaze. These are available for nearly all of the Scalescenes kits now. They come in either 00 gauge (1/76th) or N gauge (1/148th) and are screen printed onto 100 micron quality clear film, and offer an easy and affordable option to enhance your model. The windows that were needed for this kit were, Scaleglaze 15, and believe me, they are a better option than rather cutting out all of the small windows. Especially when you have huge fingers like mine. (Sorry I forgot to mention, I model in 00)
 

The side walls are the first to be cut out, and the first of the windows added. 
 

This wall is made up of four pieces, giving a very strong and detailed wall. 


Next a couple of sections of the gable tiling, along with another couple of windows. 
 

One of the side walls next, which incorporates two porch doorways. 
 

Make sure to keep everything true and square. A little out at this stage, becomes amplified as you go further on. 


Bring the gable wall with the wall tiles together with the side wall, add the windows, and that’s one wall nearly done. 


To complete this section, add the interior walls.
 
 
Next, add the side wall to the front wall. As you can see, it is made up of five layers of 2mm card. This gives the illusion of the door on the outside going up a staircase to the first floor. 

As the eagle eyed among you will have noticed, there is no door on the inside of the side wall. 

Next, the opposite side wall. 


The rear wall comes next. In one piece, along with its windows. See what I mean about all of the windows. It’s far easier with the Scaleglaze. 


Fit the rear wall to the rest of the walls, to form the basic structure, and add the interior wall as before. All of these interior walls become the support for the ceiling and first floor. 


Next, make up the interior walls and fit the bar top. Fix these in place. Again to support the first floor. 


Cut out and glue together the elements to make up the chimney stack and wrap the cover layer around it. 


Cut out the ceiling and first floor next. Making sure you remember to cut out the chimney opening first.
 

A quick tip, don’t glue the floor into position at this stage. Wait until you’ve constructed the chimney, and check that it fits through the hole. 


Make the upper interior walls next, and fit them in place. 


Cut out the main roof section next. Make sure that you colour the underside, so when in place, you don’t see any raw edges. Then fit and glue it in place.


Cut out the small section of the chimney and fit in place. 
 

Glue together the two section of the chimney stack together and wrap the cover layer. Don’t glue the two small flaps at the top just yet. These will fit around the small chimney you’ve just put in place. 


Fit the chimney through the first floor. 


Cut out the upper ceiling next. Again, don’t forget to cut out the chimney opening. 


Then fit and glue the upper ceiling. 


Fit the roof supports into place. 


Cut out and fit the remaining roof sections. Again colouring all of the raw edges.


Take your time at this stage, to make sure all of the roof sections fit together before gluing in place.


And that’s where I’m up to. Just the fine detail to add now. It should be finished on Monday, so hopefully, I’ll have the finished model to show you by Tuesday. 


Until Next Time...........