Thursday 28 December 2017

New Release..................


New Release...............

Just a quick post to let those of you that don’t know, Scalescenes have released their latest kit. It’s fantastic T013a 1970’s style semi detached houses. I’ve got my kit and I’m eager to get started. I think that it’s going to be a cracking build, simply because, unlike most of the houses that I’ve built so far, which have small sash style windows, which are difficult to see any detail inside, these houses have really big windows at the front, which opens up the view right through the open plan living space and bedrooms. So, it offers its self for fully furnishing the rooms with the TX00a Interior Detail pack. It has everything that you need to furnish the rooms. From sofas and washing machines, to beds and stereos. Time to go to town with the detail on this one I think. Keep popping by to chart my progress with this build, over the coming couple of weeks. 

It’s been a busy year for John at Scalescenes. He’s produced a huge amount of quality 
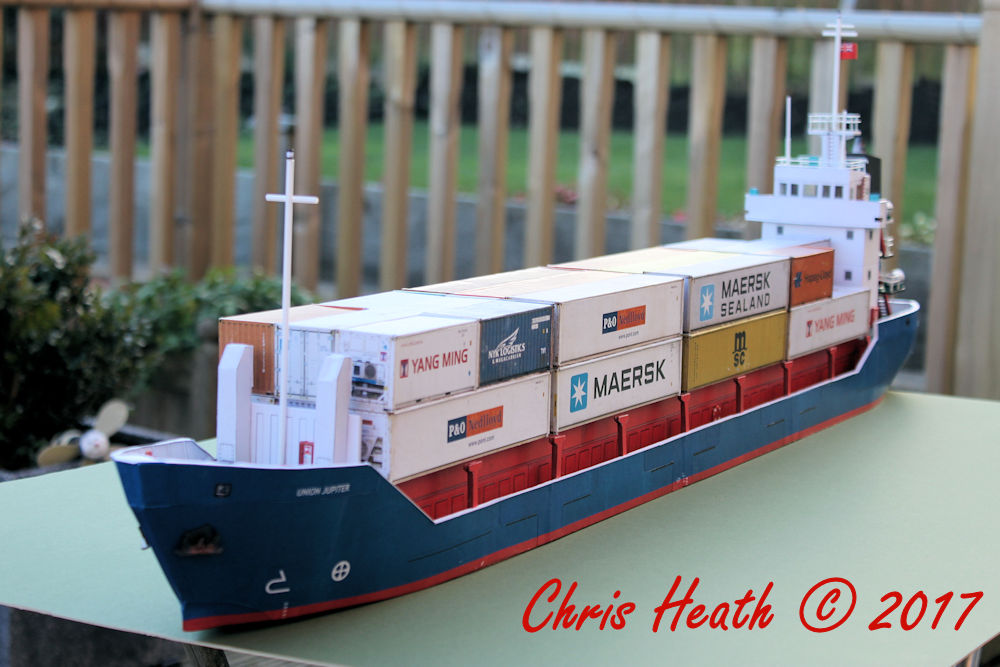
downloadable kits. From the latest 1970’s houses, to that huge Modern Cargo Ship, that was a pleasure to build. A Castle/Folly to the versatile CLASP System, ideal for anything from a Telephone Exchange to a Public Library. There was the Low Relief House Fronts with Shops options and a Stone Warehouse. And to name a few of the others, a Water Tower, a Huge Industrial Chimney and a Factory/Warehouse. Let’s hope that he keeps up the good work and continues to bring us fabulous, detailed and affordable kits for the model railway enthusiast. And don't forget about the Scalescenes Gift Certificates. Available here Gift Certificate

Can I now take this opportunity to wish everyone that takes the time to read my ramblings on here and watches my progress, a belated Merry Christmas and a very healthy and a Happy New Year. Let’s hope that all that we wish for in 2018 comes to us all, and that Scalescenes keep coming up with fantastic kits. I can’t wait for the Fire Station (just saying John).

Stay safe out there and see you next year. 

Until Next Time...........

Monday 11 December 2017

Gift Certificates............


Just a quick one for you. If you are stuck for a present for someone who is hard to buy for this Christmas, the Scalescenes website has gift certificates available. These are for any amount you choose. For the modeller in your life who is hard to buy for, these are ideal. Let them choose what they really want. Trust me, we get sick of socks, handkerchiefs and gloves. These can be found with this quick link. Scalescenes Gift Certificate. 
Until Next Time............
 

Sunday 26 November 2017

Finally Finished...........


Well I’ve finally finished the T030c Modern Cargo Ship from Scalescenes. The final push was to fit all of the small detail. 

First were the three sets of stairs, for access to all of the deck levels.
 
Next is the supports for the containers. I’m sorry that there are not many pictures of the making of them, but I was on such a mission to get the model finished, I got carried away. 

Once I got them all made, I fit them all down the hull and loaded up the containers.
 
All of the fine detail comes next. The hand rails, the stair rails and the masts. For the railings, I used the Faller kit recommended by Scalescenes. I must say I’m impressed. 
The masts were made from Ever Green hollow tube, donated from a work colleague.


And here it is, in all its glory.


The pictures simply don’t do it justice. If you are confident and want to try this kit. Don’t hesitate, it’s fantastic. 

Who would of thought that from this......


To this...... 


Would result in this.

 
I don’t know what’s next, but I’m sure I’ll let you all know what it is and how I get on with it. 
Until Next Time..........


Tuesday 21 November 2017

Almost There.................


I’m almost there with the T030c Modern Cargo Ship from Scalescenes.

The Accommodation block and Bridge structure is next. It looks complicated but believe me it’s not. It’s made up of cleverly interlinked walls. This is not only exceptionally strong but, it also helps to keep the complete structure square and true.
 
 
The windows for the Accommodation block are not as you might think. They are just sticky tape over the window image. Simple.
Handy tip, I use a glass cutting mat. This doesn’t just keep the project nice and flat, but it also helps when trying to keep your project square. I put a couple of small drops of glue to fix it to the glass, and I then let the glue on the structure dry. This keeps it all true and square while drying.
Time to add the decks and some small detail, doors, fire hoses and life rings.
 
The Bridge is next, and would you believe that this took me, with all of it’s detail, fours hours! It even has a swivel chair.
 
 
Once all the Bridge is complete, it gets placed on the top of the accommodation block. It’s starting to look quite impressive. 
 
The funnel goes on next.
 
Now the life rafts, life boat and the Davit Crane for the life boat and the railings and mast to fit, and that’s the Bridge/Accommodation block done.
 
 
Nearly there now. One final push, and I should be done.

Until Next Time…………..


Thursday 16 November 2017

It's Becoming Ship Shape...................


It’s all coming along at pace at the moment, with the T030c Modern Cargo Ship from Scalescenes. I’ve managed to get a great deal done, with having a week off work. 

The next stage to do was the hull sections. I was a little nervous with this hull, as all of the previous ships/boats that I’ve built have used light weight card stock (200gsm) for the hull sides, which forms to the base underneath really well, but this one has the hull made with 1mm card. Well worry not! As long as you take your time to gently coax the hull side with a pen, you can achieve the perfect form. And unlike the light weight card, you get a smoother finish.


Don’t worry, that gap at the bow, it’s supposed to be there.
 
Do the stern next, and do exactly the same as the bow. Take your time and gently coax. To relieve the stress on the stern section, it’s made up of two sections.
 
“Top tip” make sure you carefully sand down the joint between the two sections. It’ll give you a better finish when you apply the cover layer.
 
The mid ship sides are next.
 
Now you go around and cover all of the joints with the relevant cover layers.
 
Time now to add all of the Bulwarks around the ship. These give extra strength to the sides as well as finishing off the interior of the hull.
  
You can never have too many spring clamps at this stage.
 
The Bulwark for the hull is made up of three pieces, laminated together to achieve a slight permanent curve.
 
Now time for some fiddly detail. The breakwater, the winch, escape hatch, bollard bases and the anchor. 
 
 
The chain on the winch is made from a cheap costume necklace. I think I paid about £2, and there must be about three feet of chain. 
Once all of the fiddly bits are done, it’s time to fit all of the bulwark top edges. These cleverly cover the raw edges of the bulwark and hull.
 
 
Well that was a huge update for you, that’s where I’m at at the moment, almost a finished hull. The next stage is to construct the accommodation structure. 
Until Next Time............