Thursday 29 December 2016

Clyde Puffer...................


As you may remember from my last post, I said I was about to commence the building of the T030a Clyde Puffer from Scalescenes. It was supposed to be made in the reclaimed space I retrieved in the loft, but this wasnt to be. Ive been at work between Christmas and New Year, and to say its been quite would be a huge understatement. So, I decided to take the model to work and build it there.
Unfortunately Ive not taken any pictures of the build, apart from one, when I ceremoniously laid the keel.

But Ive taken a few of the boat in all of its glory to show you now that its nearly finished.
 
The model comes with an editable name feature. So it had to be named after my Grandson Jack.


I found the rigging a bit of a fiddle, but that was because Ive got sausage fingers. I even improvised and platted a chain from some fine brown cotton for the steering chain. I think it worked.
 
 
Overall it was a pleasurable build, a one I would highly recommended.
Well, next week should be back to normal, and Ill have to do some work instead of modelling. Oh well!!!
To finish this post, I would like to wish all that have read my ramblings, over the last twelve month, heaven knows why, a very happy, healthy and prosperous 2017. May all your families be safe and healthy, and you make all the right choices to fulfil your aspirations.
Be safe and have a wonderful 2017.
Happy New Year.
P.S.
John @ Scalescenes, keep up all of the good work, and heres looking forward to some fantastic new kits in the new year.
Until Next Time……………..


Thursday 15 December 2016

New Work Space...............


What a couple of weeks we have had, here in the Heath household. Not to go into too much detail, we have welcomed our oldest Daughter and our Grandson back into our home. To say it's been a tight fit, would be an under statement. Two houses into one, requires a gentle shoe horn. But fit it we have, and it's now onwards and upwards towards Christmas. My craft space has been returned to the dining room, and the loft where Wynyard Lane was taking shape, has had to become storage and a craft room for my wife Jak, to accommodate her work commitments. The fact that I've had to stop making my Scalescenes models, has come with a double blow. I've been suffering with lateral epicondylitis (tennis elbow) to you and me. I don't know how, as I've never played tennis, but the doctor reckons that it could be a repetitive stress injury. The only thing that I can imagine that that could be, would be the cutting out of my models. I must be the only bloke to be disabled by a piece of damned cardboard. Anyway I've had an injection to relieve the pain. But I need to rest my arm for a while to let the injury heel its self. This could have been seen as a perfect opportunity, whilst all of my craft stuff was packed away to rest and take a break but, I've got itchy fingers. So, I've reclaimed and cleared a small corner of my layout table, so that I can gently potter away making a model over the Christmas period. 


I think I'm going to have a go at the T030b Clyde Puffer, the latest offering from Scalescenes. 
No doubt I will show you my progress as I go but, it may take a while, what with this elbow. 

Until Next Time.............
 

Monday 5 December 2016

Day Two.....................


Day two of the T019 Row of Small Cottages from Scalescenes. I got a slow start to the day, as a guest that was due to be demonstrating, was running late and had to use the prep room to prepare for her show. I couldnt exactly ask her to leave, thats what the room is for, not for me. Anyway, once she had finished I got set to.

I had all of the walls and floors ready just to be glued together. Simply just butt the walls and floors together, matching the coloured walls to each other.
 
With the addition of a center wall to produce the drainpipe, continue until all the walls are up.
 
Once all of the wall are set square, its at this point the upper ceiling is fitted. This cleverly incorporates the guttering along the long edge.
 
Once the ceiling is in place, it not only makes the guttering, it also makes a soffit over the windows.
Time to tile the roof. The kit comes with either grey slate or an orange pan tile option. I opted for the grey slate.
 
The barge boards to finish off the gable end.
 
And thats where I managed to get to. Theres not much more to be done, to be honest, just the chimneys to put in place. If Id only got a start first thing, I would of managed to get it complete in the two days.
Until Next Time………….


Saturday 3 December 2016

Row of Cottages........


I've returned to Peterborough again this weekend, to accompany my wife Jak while she works. It's given me some time on my hands again, so I rummaged through my Scalescenes kits for a quick and easy project to build while in the green room. I came up with the T019 Row of Cottages. It's a quick and simple build, perfect for a weekend project.

I managed to ensconce myself back in the prep room, adjacent to the green room. With copious amounts of coffee and biscuits, it's a perfect place to hide away and build.
It all starts by cutting out all of the windows. These will be stuck onto acetate once they are cut out.
 
Next the front and rear walls are cut out along with all of the door and window openings.
The cover layers come next. I've opted for the squared rubble option.
 
A small tip. Don't cut out the centre of the doors and windows just yet. You will find it a lot easier to squarely fit the cover layers over the base layers whilst they are still in one piece.
 
Once the cover layers are in place, cut out the centre of the doors and windows and wrap them around the openings.
Fit the window sills, windows and doors in the openings. And that's the exterior walls done.
 
Time to start on the interior walls next. These are cut out the same as the exterior walls and glued together. Once completed, I found it better to put the curtains in place at this stage.
 
The gable ends are next. The same as the main walls. Exterior and interior together.
 
The chimney breasts and fire places are next. Both downstairs and upstairs.
 
At this point, I was advised that Jak had been given an early finish. So all play was stopped. Hopefully tomorrow I can start to bring all of the walls together. I will try to get as far as I can, and let you see the progress.
Until Next Time..........


Sunday 27 November 2016

Finished Fishing Boat.............


Ive been at work all weekend, so I took the opportunity to finish the T030a Fishing Boat from Scalescenes. As you know I tried to build the whole project in one weekend, whilst my wife Jak was working last weekend. Well it didnt quite happen as I had planned, but Ive had plenty of time sitting at work between wagons this weekend, to finish the final details. I must admit, this is one of my favourite kits Ive had the pleasure of putting together. It was one of the simplest kits, yet very highly detailed.
 

Because the boat needs masts, obviously you cant make them out of card or paper, I used a couple of bamboo skewers and coloured them with my brown marker. And the rigging is simply cotton, pinched from my wifes sewing basket.
  

Even the deck winch is all paper and card.
I'm very pleased with this one.
Until Next Time..........


Sunday 20 November 2016

Fishing Boat Update..........


Well here is where I got to on the challenge I gave myself to build a Scalescenes fishing boat in two days. It was a tall order, as I was building it away from home, here in Peterborough.

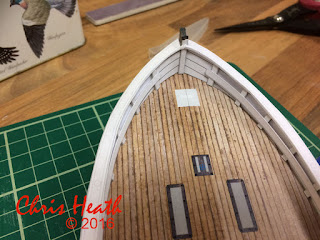
The first pictures show the hull I completed at the end of play yesterday, getting its wrap to finish off the hull.
 
Next are the bulwark sections. These act as way of strengthening the top of the hull, by laminating both the hull and the bulwark rails together.
 
Next the bulwark stays. All glued into position and trimmed back flush to the rail.
 
A bit of fine detail next, to the side of the hull in the form of fenders.
And to top of the bulwark, is the top rail.
 
Starting to look like a boat now.
Now here is where things get serious. It's time to build the deckhouse and wheel house. This honestly took me for ever, cutting out so many small and intricate parts. What with my huge fingers, it's quite hard. But the end results always blow my brain.


And here is this point at where I had to call it a day.

Until Next Time...........