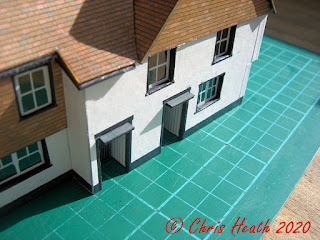
As promised, here is the finished post about the T011 Country Pub from Scalescenes. I’ve cracked on and completed the kit today. So here is how I got to the end.
I left the last post at the stage of the roofs been added.
The next stage is to add the ridge tiles. Make sure to use a marker pen to colour the raw edges, and fold the ridges tiles along the length. This will help the stay in place once glued to the ridge.


Next comes the chimney capping. A simple 2mm base and a cover layer.

All of the corner covers next, to cover the raw edges.


A couple of ceilings for under the porch way doors. Also giving a small canopy to boot.


Add the signage, and that’s it. Or so I thought.

I might as well put some chimneys on. I done a post a while ago about how I make my chimneys. Just in case you missed it, this is how I fashion a chimney pot.
Firstly, start with what is called an orange stick. These are what women use to manicure their nails. I got mine off of that well known auction site. I didn’t want to endure the wrath of my wife if she caught me using hers!

Using a sharp blade, make a cut about 2mm from the end, but don’t go all of the way through. Next score a line about 4mm from the first cut, and with your sharp knife, cut away from the score line up to the cut line. Forming a cone shape. Once this is done, cut the finished pot off the orange stick.


I colour mine with an alcohol marker.

Then add them to your chimney stacks. Simple!

And there it is. A complete Country Pub.


Roll on the new Box File Kit.
Until Next Time………..


1 comment:
Sorry to hear about your mum, Chris. Lovely to see you back, though, and for stepping us through this build with your usual excellent tips. I don't have this kit, but I do have the free version in an old Hornby Magazine, so I shall probably have a go at it whilst we are still in lockdown.
Wishing you and your family good health in these strange times.
Steve S
Post a Comment