Well it’s finally been released. The long awaited T040a
Lifeboat from Scalescenes. I’ve waited forever for this release, and by the
look of the kit, I can see why it’s taken so long! There are hardly any
straight cuts, and the detail on the deck is phenomenal. I doff my cap to John
with this kit, he has exceeded all of my expectations. The only problem is, the
only place I have to do my modelling is in our loft. The heat up there at the
moment is tropical!! I can’t get up after work because the heat from the day
has heated the loft to biblical temperatures, so I’m restricted to a couple of
hours on weekend mornings when I can get any work on the kit done. Anyway here
we go. This may take a while.
First job is to make the Cradle to stand the kit on during
the building process. It’s easy enough, just B on top of A.
|
|
|
Next, cut out all of the windows for the Wheelhouse,
before mounting onto clear acetate. Remember to not cut out the doors openings
just yet. They get cut out once it’s been mounted onto the acetate. Be careful
to align the cover layer up, so that the two circles line up in middle of the
windows.
|
|
|
|
|
|
|
|
|
|
|
|
|
|
|
|
|
|
|
|
|
|
|
|
Next, cut out and glue Bow B over Bow A, and bow C over Bow B, then Bow D over Bow C. As before make sure the Hull is sitting on a level surface, and use a small square to make sure everything lines up.
|
|
|
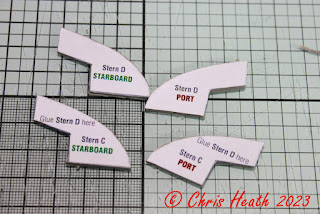
Next, move the the stern and repeat the process by cutting
out Stern A,B,C and D sections. But before you glue them together, don’t make
the same mistake as me. Make sure you cut out and glue the stern B edges in
place over Stern B. I skipped this step and had to retro cut and fit mine into place.
Once the edges are in place, glue B over A and so on. Again checking with a
square that everything is true.
|
|
|
|
|
|
|
|
|
Next, cut out the Deck Support sections. Lay the Deck
Support A on a level surface and glue Deck Support B into place.
|
|
|
Introduce a slight curve to Deck Support C and glue over
Deck Support A, only glueing at the ends and where C meets B. Set aside to dry.
|
|
|
Once the Deck Supports are dry, glue into place on the
Hull. (Taking note of Port and Starboard). The curved profile goes to the
outside.
|
|
|
Next, cut out the two halves of the Keel and glue them
together, print sides out. Apply weight and set aside to dry.
|
|
|
Once the glue has dried on the Keel, glue each side of the
hull into place. Using the red centre lines as reference. Set aside to let the
glue dry.
|
|
|
Next, cut out the two Bow Infills. With the print side down, and with a fresh sharp blade, make a wedge cut to the wider end. Introduce a slight curve to the Bow Infills. This helps them fit up against the Bow, and glue them into place onto the Hull.
|
|
|
|
|
|
Until Next Time………….


