Well it finally happened!!! The new kit from Scalescenes has been released after what has seemed like an eternity. But as they say “
Good things are worth waiting for”.
This kit is a re-engineered and
updated version of the old T021 kit, but with this kit, you don’t just get the
corner shops, you also get what used have to buy extra, which was the T020
Terraced Houses that were for the rest of terrace of shops. So in effect, this
is two kits combined into one.
For this build I’m using a different
card stock for the bases. I’ve always used bog standard 2mm and 1mm grey board
and I’ve never had any issues. But I’m not getting any younger and my fingers
are not as strong as they used to be, so I’ve sourced a different board which
is much easier to cut. I was told quite a while ago about Finnboard and sure
enough, it cuts like butter! It’s a little bit more expensive, but what I’m
saving on new blades and the ease of it cutting out, it’s a small price I’m
willing to pay.
Anyway, enough rambling, let’s get
started.
First job is to print the kit off and stick the sheets to
their corresponding thickness of card.
Next, there are two options for the windows. First option
is to cut out all of the windows and glue them to a thin sheet of acetate. Now
there are 46 windows each with 2 panes. By my reckoning, that’s 92 windows. Now
I’m no sadist, so I use option 2, which is to use a sheet of Scaleglaze windows. Simple. Also cut out the shop fronts and glue them to the same sheet
of acetate.
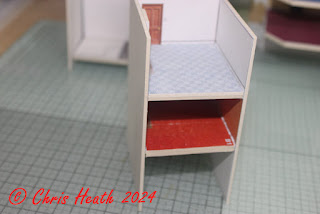
Next, cut out and glue back to back printed sides out, the
Floors/Ceilings A1 and A2. Set aside with weight to dry.
As before, cut out and glue together Floor/Ceiling B1 and
B2 back to back. Set aside to dry.
Next, cut and glue back to back the Internal Back Wall A1 sections.
Repeat for Internal Back Walls A2.
Next, cut out the Internal Back Wall B1 pieces and glue
them back to back. Repeat for the B2 sections. Apply some weight and set aside
to dry.
Cut out all the base and cover layers for A1, A2, B1 and
B2 Fireplaces and glue together. Set them aside to dry.
Next, cut out and glue back to back, the Rear Floors and
Ceilings for A1, A2, B1 and B2. Apply weight and set them aside to dry.
Cut out the Internal Side Wall for A1 next and lay it on a
flat surface. Squarely glue the Internal Back Wall A1 into place. Make sure
it’s sitting square and perpendicular. Also glue into place one of the
Floor/Ceiling A1 into place. Again, check to make sure it’s sitting square. Set
aside to dry and repeat the same procedure for the A2 elements.
Next, glue two of the Fireplaces for A1 and A2 into place.
Then glue into place the two remaining A1 and A2 Floor/Ceilings. Test fit and
glue the remaining A1 and A2 Fireplaces. Then set these aside to dry.
Once the glue has dried on the A1 and A2 structures, flip
them over and glue into place the corresponding A1 and A2 Rear Floors/Ceilings.
Next, cut out the Internal Side Wall for B1 and lay it on
a flat surface. Squarely glue the Internal Back Wall B1 into place. Make sure
it’s sitting square and perpendicular. Also glue into place one of the
Floor/Ceiling B1 into place. Again, check to make sure it’s sitting square. Set
aside to dry and repeat the same procedure for the B2 elements.
Next, glue two of the Fireplaces for B1 and B2 into place.
Then glue into place the two remaining B1 and B2 Floor/Ceilings. Test fit and
glue the remaining B1 and B2 Fireplaces. Then set these aside to dry.
Once
the glue has dried on the B1 and B2 structures, flip them over and glue into
place the corresponding B1 and B2 Rear Floors/Ceilings.Now a good time to add any interior detail (rugs, pictures
and such like) to the two upper floors. Additional interior detail is available
on the Scalescenes website. Here is the link. Interior Detail
Next, cut out the Centre Walls 1
A1/B1, B1/B2 and B2/A2. Then cut out and glue into place the Downpipes Front
and Downpipes Rear A and B in their corresponding positions.
Cut out all the Centre Walls 2 left and right next. Then
using the bottom edge, gables and chimneys, glue these to each side of the
Centre walls 1. Mark the section with the shortest rear drainpipe as B1/B2.
Sitting structures B1 and B2 side by side on a level
surface, squarely glue in between, the B1/B2 Centre Wall section. Please note
the front and rear. The shorter drainpipe goes to the rear. Squarely glue the
Internal Side walls B1 Left and B2 Right into place. Clamp together and
set aside to dry.
Next, test fit and glue the two remaining Centre Wall
sections to either end of Structure B1 and B2. Then sitting on a level surface,
glue into place Structure A1 to the left and Structure A2 to the right.
Cut out the Spacer Jig next for the Internal Walls B1 and
B2. Cut out the Lower Internal Walls B1 and B2 then using the Spacer Jig, glue
them into place.
Next, cut out the base and cover layers for the Upper
Ceilings A1 and A2. Lay the cover layers print side down and squarely glue the
base layers over the top. Tightly wrap and glue the flaps in place. Once the
glue has dried, using a fresh sharp blade, cut out the grey hatched sections.
Using a black marker pen, touch up the cut ends of the Gutters. Test fit and
glue the completed A1 and A2 Upper Ceilings into place.
Next, cut out the base and cover layers for the Upper
Ceilings B1 and B2. Lay the cover layers print side down and squarely glue the
base layers over the top. Tightly wrap and glue the flaps in place. Once the
glue has dried, using a fresh sharp blade, cut out the grey hatched sections.
Using a black marker pen, touch up the cut ends of the Gutters. Test fit and
glue the completed B1 and B2 Upper Ceilings into place.
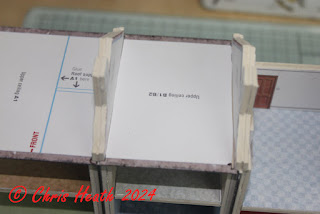
Cut out and glue into six blocks of two, the Roof Supports.
Then glue into place on the side of the Centre Walls.
Next, cut out and glue together the A1 Roof Supports then
glue them into place using the light blue lines as a guide. Repeat the same for
A2 Roof Supports.
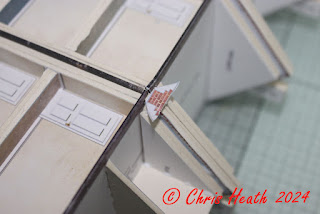
Carefully cut out the Corbel Edges next and then glue them
tightly around the top of the three Centre Walls.
Next, lightly score along the red dotted lines for Roofs
A1, A2, B1 and B2 then cut out the roofs. Introduce a slight angle then test
fit the roofs at this stage and adjust accordingly.
Cut out the Roof Tiles for A1 next. Starting at the bottom
of the Roof at row one, glue the Roof Tiles in place (1,2,3,4… and so on). Once
the glue has dried, cut away the excess. Use a small piece of tape to hold the
roof together. Then glue the completed Roof A1 into place. Repeat the same for
Roof A2.
The roofs for B1 and B2 use the same method of gluing the
Roof Tile in place. Start at the bottom with line 1 and continue to the top.
Once complete, cut off the excess and glue into place on the Roof Supports.
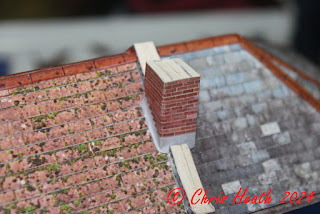
Next, cut out all the Ridge Tiles and glue them into place.
Cut out all the Chimney Sides next, then glue them to the
sides of the Centre Wall Chimneys.
Next, fold on the blue dotted lines of the Chimney cover
layers, then cut them out. Using the folds as a guide, wrap them tightly around
the Chimneys.
Cut out the Gable Coping 1b and glue into place. Repeat
for Gable Coping 1a, 1c and 1d.
Next, cut out and test fit the Gable Coping 2 sections
over the top of Gable coping 1. Glue into place.
Finally for this stage, cut out the base layers for the
Chimney Capping 1 and 2. Then tightly wrap the corresponding cover layers and
glue into place. Glue Chimney Cap 1 over Chimney Cap 2 then glue into place on
top of the chimney stacks.
That’s all for now, time to go and change my blades
Until Next Time…………..


