
Before I get started, could I please apologise for the layout of this post. The program that I use to write my blog posts in has seriously updated, and it refuses to let me use pictures as I have done before. I have tried to publish this post a couple of times, and twice it's decided post what it wanted to post. Hopefully I'll get me ageing head around it for next time.
Here we go.

 Make sure that you use the guide lines on the
edge to keep the arches even.
Make sure that you use the guide lines on the
edge to keep the arches even.
 Next, cut out the deck cover layer and lay deck underside over the top of it, and glue into place.
  Cut out and trim the parapet coping base layer
and cover layers to length
Cut out and trim the parapet coping base layer
and cover layers to length
 Wrap the cover layer around the base layer.

Here we go.
First of all, glue or stick all of the relevant sheets in connection to the Jack Arch version of the kit, to the relevant thickness of card.

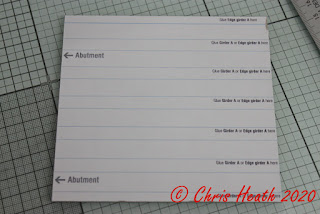
Next decide what width and length you need the bridge to be. There are very handy grid lines on either side of the bridge deck, so that you can very easily keep the deck square and true when you cut it out


Once the glue has dried, trim around the deck cover layer.Next, cut out and glue the two outer edge girders A into place.Follow by cutting out and gluing into place the rest of the girders A.. Once the glue has dried, trim to length.
Next cut out and glue into place the girders B. I like to run a marker along the edge to cover any raw edgesOnce the glue has dried, trim to length.Next, cut out the jack arches and trim to length.Use a pen or something similar to introduce a slight curve along the length. I’ve used a piece of dowelling here.Once you have the arches curved, start to test fit and glue into position.
I think I may have introduced a little too much curve to my arches, as they don’t come up to the top of the girder B. However, I did colour the raw edges, so I think I might have just gotten away with it.
Cut out and fit the girder edges over the top of the girders B nextMake sure to centre the flange plate spacers.
Next, cut out and glue all of the flange plates into place.Then trim to length.Cut out and glue together the inner and outer side girders next, and trim to length.Glue the competed side girder to the edge of the deckNext cut out and fit the side girder bottom to the underside of the side girder. Next cut out and fit the side girder bottom to the underside of the side girder.Again making sure that you keep it centred. Then fit the flange pates.Cut out and fit the side girder top the upper side of the side girder.At this point, there are a couple of options for the parapet. I used the steel option for the last bridge I built, so this time, I’ve opted for the brick parapet.
Cut out and trim to length the two pair parapet B walls.Glue both pairs back to back.


That’s where I’m up to for now. Give me a couple of days, and I’ll post the rest of the build.Then glue the coping to the top of the parapet wall.Leaving a reveal on the top of the girder.Fit the girder ends plates


Until Next Time..........

No comments:
Post a Comment