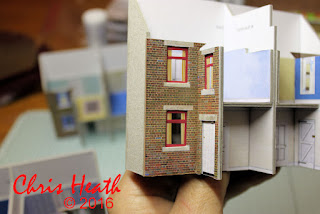
The few pictures that I do have show some of the clever techniques used by John at Scalescenes, the designer of all of the kits I use.
As you saw in the previous post, the carcass is as simple as it gets, but that's when the clever stuff starts.
The back wall of the house is in three sections. The first part takes two windows and also forms the interior wall of the downstairs scullery. The second takes a window and a door.
The windows are usually white frames, but back when I was
a young lad, where I grew up in a house not too dis-similar to these houses,
the occupiers would use what ever paint they could lay their hands on to paint
their window frames. Whether it be red, blue, orange or what ever other colour
it was, if it was cheap and available, it got used. So I thought I would
emulate these in this row of houses. I know it looks wrong, but believe me that
was the way it was back in the 60's and 70's when I grew up.
It's always a good idea to put the curtains in place at
this stage. As it becomes a little tricky if you leave it any later. And
remember, make sure the curtains are straight. As I got told off once off my
wife for them being crooked.
Right, I'm sorry but that's where the pictures finish. I
got carried away at work and all but finished the row. I don't have the
pictures taken yet, but hopefully in the next couple of days I will get them
sorted and share them with you to show how far I've come with my diorama.
Until Next Time............


1 comment:
You are so right about the window paint. My father-in-law got hold of a load of bright yellow paint cheap about 40 years ago and painted his bungalow windows (Crittall) with it. They were re-painted last year with the SAME batch of paint!!!
Post a Comment