
Well it’s
been a while. I apologise for being away for so long, but what with work
commitments and life in general, along with the loss of my mojo, posting on my
blog was the last thing on my mind. But now I’m back with renewed enthusiasm
and drive!
I’m eagerly awaiting the release of
the new Shops on a slope kit from Scalescenes. Hopefully this will be in the
next few weeks, but until then, I’ve got my hands on the free giveaway in the
September issue of Hornby Magazine.
It’s a Low Relief Corner Shop, and I
can’t wait to get my teeth into it.
Please forgive me for the layout of
this post, but the version of the blog publisher I use has changed immensely,
and I’m try to work my way around the changes.
So here goes, let’s see if I can
remember how to do these kits.
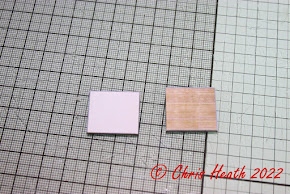
It all starts with the ingenious way that the drainpipe is incorporated within the interior walls. There’s no way it can be knocked off once finished.


Next cut out
all of the floors and ceilings and glue the corresponding pieces back to back
with each other.


Next, cut
out and glue back to back, the two side walls. Once dry, fit into place. Cut
out the upper ceiling and glue in place.


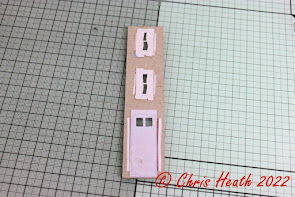
Next, cut
out the smaller of the front wall base layer and cover layer. A couple of top
tips at this stage. With a felt pen or marker, try and match the colour of the
brick and mark the underside of the window openings, on both the base layer and
cover layer. This hides the raw edge of the cover layer and the base layer. The
next top tip, just cut out the header and sill openings on the cover layer
leaving the flaps uncut at this stage. I find that leaving them uncut, it helps
to keep the cover layer square when gluing to the base layer. Cut the window
openings out once the cover layer is glued to the base layer.


Next, cut
out and glue the sills into place.


Windows are
next. I’m fortunate that I have supply of Scaleglaze windows, which are
brilliant, and I highly recommend them. They save so much time and effort in
cutting out fiddly windows, so I’ve used them, but if you haven’t got
Scaleglaze windows, carefully cut out the windows supplied with the kit and
glue into place along with the door. At this point, if you are putting curtains
on, do it now. Once complete, glue into position.


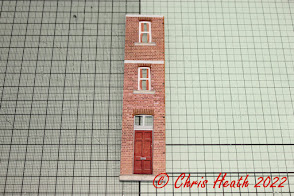
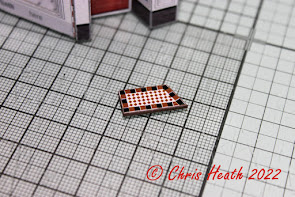
The shop
floor is next. Simply cut out and glue into position. Once the floor is in
position, add the interior detail of the shop.


The main
front wall is next, and it’s just repeat as for the small wall. Apart from you
need to introduce an angle in the base layer before you glue the cover layer in
place. Once complete, and if you’ve fit any interior detail, fit and glue into
position.


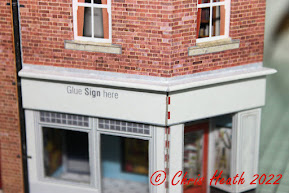
Next,
carefully cut out the shop overlay and mount onto clear film or acetate, then
glue into position on the shop front.

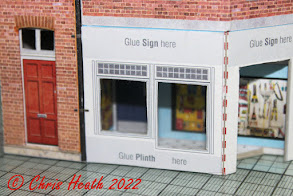
The
Shopfront 2 is next. Carefully cut out and mount onto acetate as before and
carefully score the red score lines, and fold into the correct angles. Glue
into place and the fit the door shop step into position.


Working on
the shop front is next. Cut out, score and fit the first fascia base layer and
glue into place. Next cut out both the base and cover layers for the fascia ledge and glue together. Once dry, carefully cut out the hatched area and glue
over the fascia. Cut out and glue into position the fascia cover layer. Then cut
out and fit your choice of shop sign.


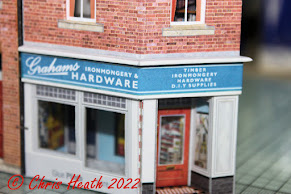
Cut out and
fit the shop overlay into place.


Cut out both
the plinth base and cover layer and glue together. Touch up any raw edges with
a marker pen, then glue into position.


Cut out,
colour the raw edges, test fit and glue the front wall ledges into position.


The gutter
is next. Cut out the base layer and glue the corresponding cover layers into
position. Touch up any raw edges, then test fit and glue into position.


The roof
supports and chimney are next. Glue the three chimney base layers together.
While the glue sets, cut out the chimney cover layer. Once dried, wrap around
the base layer. Cut out and glue together into blocks of two, both of the roof
supports. Then glue onto the corresponding positions on the gutter layer. Clamp
together to make sure they set.


Cut out all
of the roof supports and glue together roof supports 1 and 3 into blocks of
two. Once dried, again following the blue guidelines, fit to the gutter
layer.

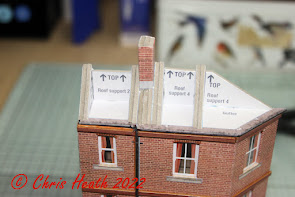
Top tip. Make
sure that all of the supports are in line. This will make sure that the roof is
nice and flat.

The roof
comes next. Cut out the roof base layers and carefully score the red line on
the larger piece. Cut out the individual tiles for both the roof sections. Take
note that the tile strips and the base layers, now come with numbered
references. These help with lining up the weathering patterns on the tiles.
Continue to apply the tile strips all the way to the top.


Once you’ve
completed the tiles, test fit and glue into position the roof sections and fit
the ridge tiles.


Cut out the
chimney capping base and cover with the cover layer. Fit into place.


And finally,
cut out and glue into position the side wall overlay.


And that’s
it. I’m calling this done. I’ve enjoyed this kit and it’s good to get back into
the swing of blogging about the process. Hopefully the main kit that I think
that this kit is taken from, the Low Relief Shops on a Slope, isn’t too long
before it’s released. Can’t wait. It’s been a long time coming.
Until Next Time……………..

No comments:
Post a Comment