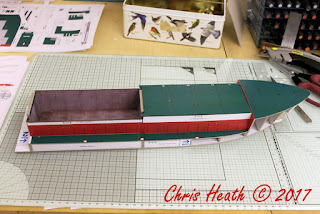
The holds
on the bow section are identical in construction to the stern section.
“Top tip” When needing to hold a
piece in place until the glue sets, you can use a spring clamp. But when you
can’t use a clamp, a small wedge cut from a scrap of card, will hold the
gangway support perpendicular to the hold side until the glue dries.
The next hold is a bit of a cheat.
To gain some integral strength at the bow, the hold covers will be closed
permanently so as not to see the strengthening structure within. The hold
covers on this section is in one solid piece. At the same time, you can add the
bow deck.


And with that, the bow section is at the same stage as the stern. Time to bring these two sections together for the first time. And as before, there is a great amount of surface area between the base and the hold ceiling, to achieve a good bond for the two sections.


And there you go. Time to clear the workbench so I can fit the complete hull on.


Next it’s the hold lids. These are a simple box construction, a top, a bottom and four sides. Simple.


Well it would have been if I didn’t have another eleven to do!!


It’s at this stage it’s time to decide which way the build is going. The kit can be either a general bulk carrier, which would mean that the hold covers would be left off for now, and fixed into place once you decide how you want to display the ship, either with the covers open or closed. Or it can be a container carrier, which means the covers need to be fixed down at this stage. I’m opting for the latter, as I’ve already got a load of containers ready made for the ship.


The stern deck gets fixed into place now.

The hull is coming together quite well now. The next stage is to fix the hull sides into place. Now that will have to wait until the next post.
Until Next
Time............


1 comment:
Fabulous work Chris, you must have plenty of patience. Love the shade of green on the carrier, not unsimilar to my Ford Puma green. Looking forward once more to the next instalment.
Mary x
Post a Comment