Here we go again. It’s time to get to grips with the latest release from Scalescenes. It’s the new T029 China Clay Facility. I’ve been looking forward to release, as it has a few new construction techniques and new features, to make the final model easier to construct and sturdier. These techniques will be incorporated in future kits. I’m also going to try and incorporate lighting in this kit. I’ve dabbled briefly on my last kit I built for my wife’s project, and I was pleased with the results. It was a lot easier than I thought. More on this when we get to it in the build.
Where here it is, in all its constituent parts. Just in case you don’t know, I use A4 self adhesive labels for my kits. In my opinion, I find this way so much easier and less messy.

Remember to make sure all of the air bubbles are smoothed out.

The first set of instructions are for a jig to be used later in the build. It’s a block made up of strips of 1mm card. This gets fixed to a base layer and a second piece of card to make a grip strip. More on this later.


The main kit starts with the side walls. Which incorporates floor supports.

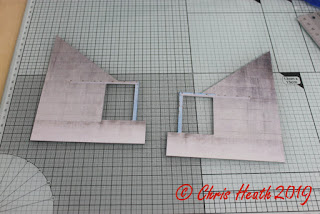
 It’s made up of three layers, the third layer
has built into it the door frames.

When gluing two layers together, I like to offer the two together in a dry fit and mark where the glue is to go. This eliminates over gluing any areas that don’t need gluing.


Once the walls are dry, there is a cover strip to hide raw edge. These walls are set aside for now while construction of the rear wall.

This has a great deal of photographic detail added. This will be visible through the open doors when finished.

The buttress pieces are fixed into place now. Followed by the bunker supports.

Make sure to keep the supports perpendicular with small square, and flush with the bottom with the edge of your ruler.


Ready to put the side walls on next. Make sure to try and keep the structure square.

The Bunker Rear Wall gets fixed into place now.

The platform support walls get fixed in place next.
This is one of the new construction techniques. Notched joints making the sub-structure a lot stronger.


Once the support walls are put into place, the structure squares up nicely and becomes sturdier.


That’s enough for now. It's all coming together quite well.
Until Next Time...........


No comments:
Post a Comment