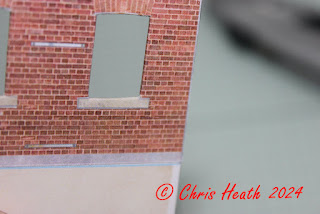
Time for the next installment of the new kit from
Scalescenes. In the previous post, I built the main carcass for the row of
shops. Which consisted of three mid-terrace buildings and two end/corner
buildings. I also managed to get all the roofs fit into place and the chimneys
done.
The next stage is to start on the
facades. The first one I’m doing is A1.
Start by cutting out the Front, Side and Corner Wall cover
layers. Cut out all the window and door openings. Once these are cut out, cut
out the corresponding base lase layers and carefully glue the cover layers over
the top. Don’t glue the outer wall flaps at this stage.
|
|
|
Next, fold the window and door flaps around the openings
and glue into place. Cut out the corresponding sills and glue these into place.
|
|
|
Cut out and glue your window options next, and squarely
glue into place. The Scaleglaze windows that I’m using are one sheet of
Scaleglaze 1.
|
|
|
Next, cut out the Front and Side Wall A1 shop window
openings.
|
|
|
Cut out the Side Wall Doors 1 and 2 next, and glue them
into place.
|
|
|
Next, cut out the Interior Side, Front and Corner Walls
A1. Then glue these to the back of their corresponding front walls.
|
|
|
Turnover and place the Side Wall A1 brick side down, then
cut out and glue into place the Extension Internal Side Wall A1.
|
|
|
You can now glue the outer flaps into place on the Side
and Front walls.
|
|
|
Next, cut out and glue into place your choice of curtains.
|
|
|
|
|
|
Cut out the Rear Wall Base layers next, then glue the
corresponding cover layers in place. Wrap and glue the window flaps. Glue the
Sills and Windows into place as before.
|
|
|
|
|
|
|
|
|
|
|
|
Time to fit the Facades. Firstly, test fit the Front Wall
A1. If you’re happy with the fit, glue it into place.
|
|
|
Next, repeat for the Corner Wall A1. Making sure that you
keep the righthand side tight against the inside edge of the front wall.
|
|
|
Test fit and glue the wider Rear Wall A1 into place next.
Making sure that the righthand side outside edges line up with ends of the
internal floors.
|
|
|
Once the glue has dried on the Rear Wall, test fit and
glue into place the Side Wall A1. Make sure that the top edge is tight under
the roof gutter.
|
|
|
Next, cut out the Pipe C cover layers and glue them over
their corresponding base layers. Once the glue has dried, carefully cut out the
grey hatched areas. Use a black marker on the raw ends.
|
|
|
Test fit and glue into place one of the Pipe C pieces
along the edge of the Rear Wall A1 next.
|
|
|
Next, test fit and trim the width of the remaining Rear
Wall A1 and glue into place.
|
|
|
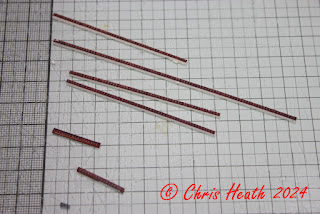
Cut out both Pipe A and Pipe B pieces next. Cut out the
Pipe Cutting Jig and cut the pipes to length. Using the grey lines on the rear
wall, glue two of the pipes in place.
|
|
|
|
|
|
Next, cut out and glue into place the Side Wall Ledges A1.
Then repeat for Corner and Front Wall Ledges A1.
|
|
|
|
|
|
Set the structure to one side and let the glue dry. While
it’s drying, cut out the Extension Side Walls 1 and 2 then glue together. Apply
weight and set aside to dry.
|
|
|
Next, cut out the Extension Wall A1 base and cover layer.
Glue the cover layer over the base layer. Do not glue the left-hand flap at
this stage. Fold the window and door flaps around the openings and glue into
place. Cut out the corresponding sills and glue these into place. Glue the
window and door in place.
|
|
|
|
|
|
Cut out the Extension Interior Wall A1 next, then glue to
the back of the exterior wall.
|
|
|
Next, test fit and glue the Extension Side Wall 1 and 2
section, to the righthand edge of the Extension Wall. Then carefully wrap the
loose flap around the back of the side wall. Check that all is square then set
aside to dry.
|
|
|
Cut out the two Extension Floor Supports A1 next, then
test fit and glue one of the in place on the extension wall.
|
|
|
Next, cut out the two Extension Floor A1 sections. With
the structure sitting on a level surface, glue the two floors into place along
with the remaining Extension Floor Support A1. Check for square and set aside
to dry.
|
|
|
Cut out the two Extension Ceiling Supports next. Then glue
one in place on the side wall. The other gets glued to main wall on the
extension.
|
|
|
|
|
|
With the structure sitting on a level surface. Test fit
and glue the completed extension into place. Make sure that the lefthand side
is tucked in behind the drainpipe.
|
|
|
Next, cut out, fold and glue the four Extension Roof Rails
A1.
|
|
|
Cut out the Extension Roof Base A1 and the Extension Roof
Panels A1. With the base facing up, glue the first of the Extension Roof Panels
in place. Then along the edge, glue one of the roof rolls in place. Continue
this until it is all covered.
|
|
|
Once the roof is complete, test fit and glue into place on
the extension.
|
|
|
Next, cut out the Extension Leader Head A1 and the
Extension Downpipe A1. Then glue these into place.
|
|
|
Time to make the Stairwell next. Cut out the Extension
Stairwell Side Walls 1 and 2 A1 and glue back to back. Repeat for the Extension
Stairwell Walls 1 and 2 A1.
|
|
|
With the Extension stairwell wall facing up, glue the
Extension stairwell sidewall in place. Check for square.
|
|
|
Next, cut out the two Extension Stair Supports A1 and glue
one of them in place on the sidewall. Glue the second one in place opposite.
|
|
|
|
|
|
Carefully cut out the Extension Stairs next and starting
at the bottom, glue them onto the Extension Stair Supports. Continue all the
way to the top, then glue the longer piece into place.
|
|
|
|
|
|
Next, cut out and glue the Extension Stairwell A1 cover
layer tightly around the outer walls.
|
|
|
With the structure sitting on a level surface, glue the
completed stairwell onto place. Then cut out the Extension Stairwell Wall
Capping A1 and glue into place.
|
|
|
Next, cut out the Extension Wall Capping A1 pieces and
glue them into place.
|
|
|
Cut out the Corner, Front and Side Shop Overlays A1 and
glue these into place.
|
|
|
|
|
|
Next, cut out the Front and Side Plinth cover and base
layers. Wrap and glue the covers over the base layers.
|
|
|
|
|
|
Cut out the five Pillar cover and base layers and wrap and
glue the covers over the base layers.
|
|
|
Next, cut out the Pillar Tops and glue these into place
along with the Pillar Caps.
|
|
|
|
|
|
Glue one of the two light grey pillars into place to left
of the side shop overlay. Check for square. Do not glue the second one in place
just yet.
|
|
|
Next, cut the Corner Facia Supports A1 and glue into
place.
|
|
|
Sitting the structure on a level surface, glue the Side
and Front Wall Plinths into place. The glue the remaining Light Grey Pillar
into place.
|
|
|
Next, cut out the Facia A1 and glue into place. Then cut
out one of the Sign Options A1 and glue over the top of Facia A1.
|
|
|
|
|
|
Cut out, roll and into a tube, the Exhaust Duct Lower A1.
Cut out the Exhaust Duct Upper A1 and roll around the top of the lower. Glue
into place. Carefully cut out and glue the Exhaust Duct Mount A1 into place.
Then cut out and glue into place Exhaust Duct Cap A1 into place.
|
|
|
Finally, to complete the shop A1. Cut out the Exhaust Duct
Base A1and glue it into place. Then glue into place the completed Exhaust Duct.
|
|
|
That’s all for now. The next installment will be the A2
Shop.
Until Next Time…………


No comments:
Post a Comment