Time for the final push on the Scalescenes T021a Three Storey
Row of Shops. I would like to clear my work bench before the end of the year,
in anticipation of the next kit from Scalescenes, hopefully in the New Year.
You may notice in the one of the
below pictures, that the walls on the Front Facade are a little short in width.
This was due to my printer randomly printing some of the sheets at 95%!!! I
hadn’t realised this at the time and it wasn’t until I was constructing the kit
when I noticed. Unfortunately I’d built quite a substantial amount of the kit.
I then had to deconstruct the affected components and start again. Rest
assured, they all fit now.
The next stage is the Facades for
shops B1 and B2 Shopfronts. It’s quite a simple process as done before. Cut out
the Front Wall Base and Cover layers B1 and B2, including the window openings.
Then glue them covers over the base layers.
|
|
|
Next, cut out the corresponding Window sills, Windows and
Curtains then glue these into place.
|
|
|
|
|
|
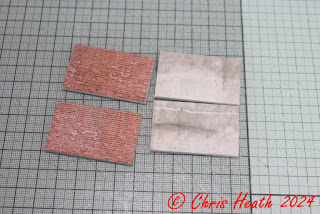
Test fit and trim if necessary, the completed Facades. Once you’re happy with the fit, with the structure on a level surface, glue them into place. (Unless you printed at 95%. DOH!!!)
|
|
|
Next, carefully cut out the Front Wall Ledges, then use a
coloured marker along the raw edges. Then squarely glue these into place.
|
|
|
Time to start on the backs for sections B1 and B2. As before,
cut out the Rear Wall Base and Cover layers. Glue together.
|
|
|
Next, cut out the corresponding Window sills, Windows and
Curtains. Then glue these into place.
|
|
|
|
|
|
With the structure sitting on a level surface, take the two
wider Rear Walls B1 and B2 sections and glue in place on the rear structure.
Take the two remaining Pipe sections and glue these in place down the edge of
the wider B1 and B2 sections. Then test fit and glue into place two remaining
narrower Rear Walls B1 and B2 sections.
|
|
|
|
|
|
Next, take your pipe cutting jig and cut some waste pipes to
length and glue these into place on the grey lines on the rear walls.
|
|
|
|
|
|
Now, as with all of the previous walls, cut out the base and
cover layers for the Extension Side Walls B1 and B2 and glue these into place
cover layers onto the base. Cut out the corresponding Window Sills and Windows
and glue these into these into place. Cut out the Extension B1 and B2 Doors and
squarely glue these into place cover place.
|
|
|
|
|
|
|
|
|
Next, cut out and glue into place, the Extension Interior Side
Walls B1 and B2 sections. Set these aside to dry.
|
|
|
Cut out the Extension Wall Base and Cover layers B1/B2 next.
Glue the cover over the base. Don’t glue the Chimney flaps at this step. Cut
out all of the corresponding Window Sills and Windows. Then glue these in
place.
|
|
|
|
|
|
Next, cut out the Extension Interior Wall B1/B2 and the Rear
Wall Downpipes B1/B2. Wrap the Downpipes around the edges of the Interior
Walls. Then glue the Exterior and Interior Walls back to back. Note the
interior wall is slightly wider to form the Downpipes.
|
|
|
|
|
|
Cut out the Extension Chimney B1/B2 next and glue into a block
of two. Then glue this block to the Chimney on the extension. You can now wrap
the remaining flaps around the Chimney.
|
|
|
|
|
|
Next, cut out the two Extension Centre Walls and glue these back
to back, with the printed sides out. Cut out the Extension Centre Wall Capping
B1/B2 and glue over the top of the Centre Wall section.
|
|
|
|
|
|
Cut out the Extension Upper Centre Walls B1 and B2 next, then
glue these in place on the Centre Wall. Once these are in place, glue the
complete Centre wall onto the centre of the Extension Wall. Use a square to
make sure everything is perpendicular.
|
|
|
|
|
|
Next, cut and glue back to back the Extension Floors/Ceilings B1
and B2. Once these are in glue has dried, glue these into position.
|
|
|
Test fit the Extension Side Walls B1 and B2 sections in place.
Once you’re happy, glue into place. Make sure the walls are square and
perpendicular.
|
|
|
Next, on a level surface, offer up the complete Extension to the
rear of the structure, making sure it sits between the two protruding
Downpipes. If it fits, glue it in place. Set it aside for the glue to dry.
|
|
|
Cut out the Extension Upper Ceiling B1/B2 cover and base layers
next, then fold along the blue dotted lines, then using the fold as a guide,
glue the cover over the base. Once the glue has dried, with a fresh blade, cut
into two sections and cut away the grey hatched areas. Test fit and glue these
into place on the extension.
|
|
|
|
|
|
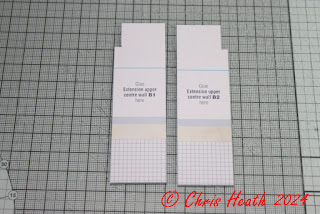
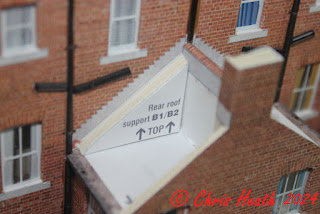
Next, cut out the Extension Roof Supports B1/B2 and glue into two
blocks of two. Fit these into place.
|
|
|
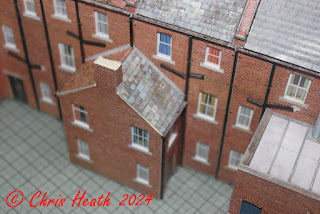
Time to make the roofs. Cut out the Extension Roof Base layers
and the cut into strips your choice of roof tiles. Starting from the bottom,
glue the strips in number sequence all the way to the top. Trim off any excess.
Glue the complete roofs into place.
|
|
|
|
|
|
Make up the Extension Chimney Capping and glue into place.
|
|
|
Using your pipe cutting jig, cut some Pipe A sections and glue into place.
|
|
|
|
|
|
Next, cut out, test fit and glue into place the B1 and B2 Shop
Overlays.
|
|
|
Glue the last remaining Pillar just under the Downpipe.
|
|
|
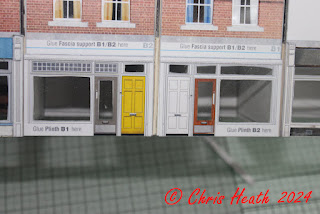
Next, cut out and glue into place the two B1/B2 Facia supports.
|
|
|
Cut out the Facia A base layers and the Facia Cover Layer.
Squarely glue the cover layer over the base. Cut out and glue your choice of
sign onto the Facia. Glue the complete sign in place.
|
|
|
|
|
|
Next, cut out the Plinth Cover layers B1 and B2 and glue these
onto the Plinth Base layers. With the structure on a level surface, glue the
complete plinths into place.
|
|
|
|
|
|
Cut out the Pavement Rear and Yards A1/B1 and B2/A2 next. Cut
out the Kerb A and B covers then wrap and glue around the kerb edges. Cut out
the Half Kerbs into individual pieces. Carefully wrap and glue these around the
curved edges.
|
|
|
|
|
|
Now making sure that you have all of your interior detail and
shop fittings in place, glue the complete structure onto the Pavement and Rear
Yard bases.
|
|
|
Next, cut out and glue all of the Shop Entry and Side/ Extension
and Storeroom Steps into place.
|
|
|
The final couple of steps for this kit is to make the Yard Walls
and Gates. Cut out and glue back to back, the two sets of Yard Walls.
Set aside to dry.
|
|
|
Cut out the Yard Wall Gate Fronts and place these face down. Cut
out and glue the Yard Wall Gate backs over the top. Carefully cut out the Yard
Wall Gate Battens and glue these in place on the gate backs. Glue the completed
gates to the walls. Glue the complete Walls/Gates into place.
|
|
|
|
|
|
Cut out and glue into place the Gate Posts. And finally, cut out
and glue into place the Yard Wall Capping.
|
|
|
|
|
|
And that’s it for this kit.
|
|
|
|
|
|
|
|
|
|
|
|
I’ve got mixed emotions with this kit. On the plus side, it’s
another fantastic kit from Scalescenes and it is unbelievably detailed and
sturdy. On the downside, I’m not so sure about the Finnboard that I used
instead of the grey board I normally use. Yes it cuts like a knife through
butter, but it’s not as dense as the grey board. So some of the smaller
elements feel a little flimsy. I’ll give it another chance on the next kit, but I think I prefer good old grey board.
Right, when’s the next kit coming
out!
Until Next Time………….












1 comment:
So relieved to find that the Master himself sometimes falls foul of the 97% scaling issue that printers throw out! I had a huge box of multiple prints of various kits that I managed to do on works’ colour printers (ahem) and was then gutted to discover that nearly all of them had automatically “shrunk to fit” when printing directly from the computer Operating Environment (rather than opening in Adobe Acrobat and checking each individual print was set for 100% scaling!) Lesson learnt by me was - don’t trust the 🤬 printer - ever! Lovely build of the shops - assuming you are still printing onto self adhesive labels, Chris? Steve S
Post a Comment