|
|
|
|
|
|
Next,
while the glue sets on the lower section, take a couple of cocktail sticks, cut
them to length and paint them white. Set them aside to dry.
|
|
|
Next,
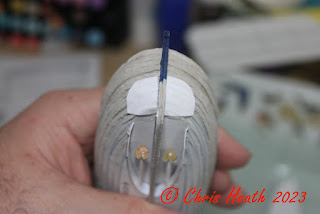
cut out, test fit and glue the Propeller tunnels into place. Then pierce a hole
for the Prop shaft.
|
|
|
Once
the paint has dried on your cocktail sticks, trim to length and fit into the
Propeller Tunnel.
|
|
|
Next,
fold the Propeller Plate in two and glue together. Carefully cut out the
Propeller plate and using the supplied jig. Once these are cut out, fit them
onto the Propeller Shafts.
|
|
|
Now
that the Lower Hull sections are now complete, carefully line-up the blue
guidelines and glue into place.
|
|
|
Next,
cut out and glue into place the Lower Hull Sides A into position.
|
|
|
Cut
out and test fit the Lower Hull Sides B. If it all lines up, glue it into
place, taking your time to align the inside edge of the hull side with the
propeller tunnel. Continue to glue all the way to the Bow.
|
|
|
|
|
|
Cut
out, test fit and glue the Aft Cockpit Grate into position.
|
|
|
Before
we go any further, as you can see from the below pictures, my 2mm card is
obviously thicker than 2mm. So to rectify this, I’ve shaved off about 1mm from
the Bow and Stern sections, so that they are the same height as the Deck
supports. This will mean that the Deck will sit correctly.
|
|
|
Next,
cut out the Deck, test fit it and making sure it’s central, glue it into place.
Apply even pressure while the glue dries.
|
|
|
Cut
out the Upper Hull Sides next. Test fit them and if they fit, starting at
the Bow, carefully glue into place along the Hull. Carefully form the sides
into place. As you can see in the final picture, my 2mm card is definitely too
thick. You can see the nicks in the white Lower Hull just under the blue of the
Upper Hull. I’m sure I’ll be able to conceal these later in the build.
|
|
|
|
|
|
And
that’s where we are at, at the moment.
Until
Next Time……….


No comments:
Post a Comment