
More progress has been done on the Scalescenes T040a
Lifeboat. Unfortunately I’ve moved onto all of the fiddly elements on the deck,
and with my sausage fingers, it’s been slow progress. Anyway here’s what I’ve
achieved.
Construction of the Cabin Hatch is next. Cut the Cabin Hatch Base Layer A out along with the two Cabin Hatch B pieces and glue pieces B onto A.
 |
 |
Once the glue has dried, turn the base over and glue the
Cabin Hatch Cover Layer over the top, and glue the Cabin Hatch into place. Make
sure the hinges face the thick edge of the wedge.
 |
 |
Next cut out the two Cabin Hatch Side base layers along
with the Cabin Hatch side cover layers, then wrap the cover layers over the
base layers. While the glue dries, cut out the Cabin Hatch Roof then fold and
glue in half. Introduce a slight curve to the roof and glue bingo place.
 |
 |
 |
 |
Then glue the complete Hatch into place.
 |
|
Cut out both the base layer and cover layer for the Aft
Hatch. Then wrap the cover around the base. Then glue the Hatch into place.
 |
 |
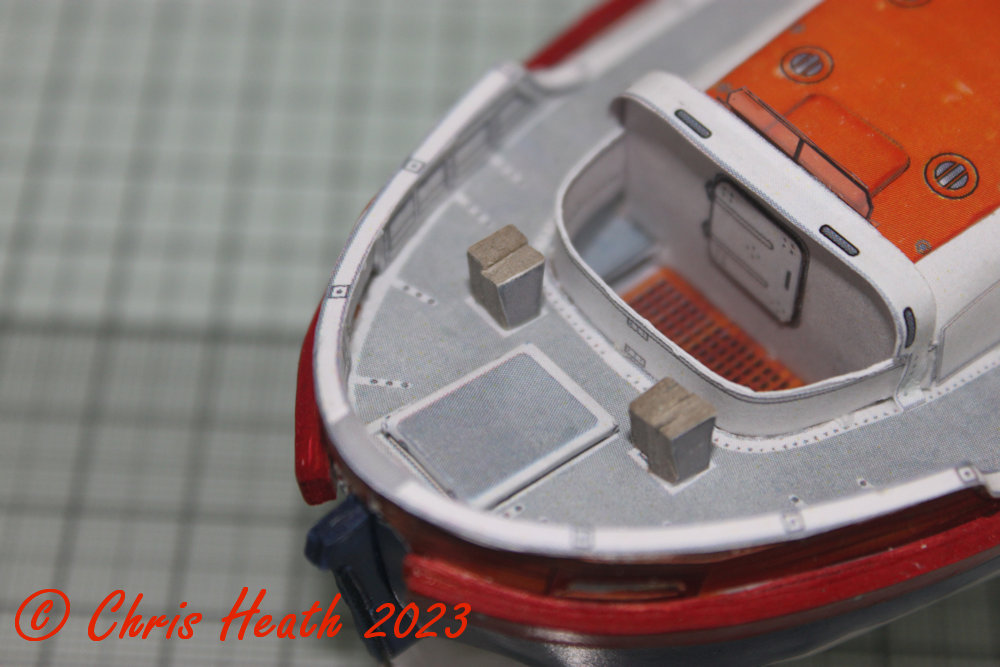
Next, cut out and glue together into blocks of two,
printed sides out, the Aft Bollard Sides. Then glue these into place. Then cut
out and glue the two Aft Bollard tops into place.
 |
 |
 |
 |
Cut out the Side Light Surrounds and glue into place onto
the Side Lights. Glue the completed lights onto their respective sides.
 |
 |
Next, cut out the base and cover layers for the two Life
Rings. Wrap the base with the covers and glue the complete Life Rings into
place.
 |
 |
Cut out the two Extractor Vent base layers and cover
layers, wrap and glue into place.
 |
 |
Cut out and glue the Engine Room Escape Hatch into place.
 |
|
Next, cut out the base layers for Winch A and Winch B, the
glue together using the blue guidelines. While the glue dries, cut out the
Winch cover layer. Wrap and glue it around the base layer. Then glue the
complete Winch into place.
 |
 |
 |
 |
Tightly wrap and glue the Capstan into a tight tube. Once
the glue has dried, cut the Capstan to length and glue into place.
 |
 |
Next, like with the Capstan, tightly roll and glue the
Bollard into a tube. Once dried, cut to length. Pierce a hole through the
Bollard and glue into place a small piece of tubing or wire, to complete the
Bollard. Now glue it into place.
 |
|
Again as before, cut out, tightly roll and glue the
Ventilator Shafts into tubes. While these are drying, cut out and fold the
Ventilator Hoods. Gently curve the Ventilator Hoods into a semi-circle, and
glue into place on the Ventilator Shafts. Once the glue has dried, cut the
complete Ventilator shafts to length and glue into place on the Bow and Engine
room.
 |
 |
 |
 |
 |
 |
And that’s it for now. Not much more to do now. I should
get it done in the next session hopefully.
Until Next Time………….

No comments:
Post a Comment