
Back again. I’ve made a little more headway on the Scalescenes T040a Lifeboat kit. Like I thought, it’s going to be a slow build, due to the Saharan conditions in my loft. Even when the sun is not at its brightest, my main pitched roof is south facing and gets the sun all day. I think I may have to look to get solar panels!! Enough rambling, here’s what I’ve achieved in this stint.
The next part of the kit is the Engine Room of the boat. Cut out Wall D and place it face down, the glue Wall D Control Panel on top. Then glue into place.
 |
 |
Next, cut out the two Wall E sections and glue them
together back-to-back.
 |
 |
Cut out Wall F next, and glue into place.
 |
 |
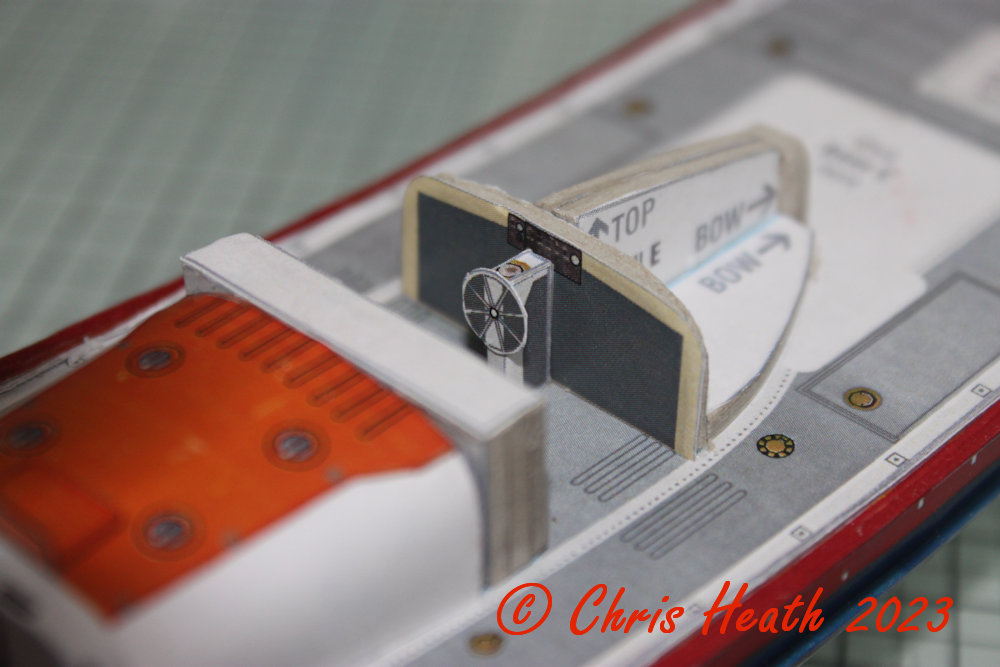
Next, cut out the Wheel Mount base layer and wrap its cover layer around. Then cut out the Wheel and glue it onto the Wheel Mount. Then glue it into place against Wall D.
 |
 |
 |
|
Next, cut out the Engine Room Side Walls and introduce a
slight curve. Then check fit and glue into position.
 |
 |
Cut out the Engine Room Roof, then glue into place.
 |
 |
Right, here’s where you need the stock up on your new knife blades. I had to cut out the Base Layers C1 and C2 twice, because my blade wasn’t sharp enough the first time to cut a neat curve in the 2mm greyboard. I found by using a new blade and making several light cuts, instead of trying to get it cut in a couple of passes worked better.
Cut out the two Base C1’s and glue together. Glue Base C2 on top, making sure that the Rope tray and cut-out sections line up.
 |
 |
 |
Next, cut out the Base C Cover Layer and wrap around the front of the Base Layer section. Then glue the Base C section into place. Cut out and glue into place Base C top on top of Base C.
 |
 |
 |
 |
Next, cut out the two Rope Tray base layers and glue
back-to-back. Then glue into place.
 |
 |
 |
 |
Next, cut out the Rope Tray cover and glue it into place.
 |
 |
Carefully cut out the Wheelhouse Internal walls next.
With the print facing in, glue into place.
 |
 |
Next, cut out the Windscreen Support and introduce a
slight curve. Then glue into place.
 |
|
The Wheelhouse is next. With a fresh sharp blade, lightly
score the dotted red lines to make it easier to fold. Before you cut out the
doors, cut out the whole of the Wheelhouse walls and make your folds. I found
it easier to cut the doors out once the folds have been made.
 |
 |
Next, cut out one of the Wheelhouse Roof options and the
Wheelhouse Roof Underside. Place the roof option print side down and glue the underside
on top.
 |
 |
 |
|
Now you must decide which position you want the
Wheelhouse doors. Once you’ve decided, cut out the relevant Wheelhouse Door
Rails and glue into place.
 |
 |
Next, cut out and introduce a slight curve to the doors.
Then glue them into place.
 |
|
The last job I’ve got for this session, is to roll up the
Wheelhouse Cover and glue it into place.
 |
 |
That's it, I’m now off to dunk myself in a cold shower to cool
down!!
Until Next Time…………

No comments:
Post a Comment