Sunday, 20 November 2016

Fishing Boat Update..........


Well here is where I got to on the challenge I gave myself to build a Scalescenes fishing boat in two days. It was a tall order, as I was building it away from home, here in Peterborough.

The first pictures show the hull I completed at the end of play yesterday, getting its wrap to finish off the hull.
 
Next are the bulwark sections. These act as way of strengthening the top of the hull, by laminating both the hull and the bulwark rails together.
 
Next the bulwark stays. All glued into position and trimmed back flush to the rail.
 
A bit of fine detail next, to the side of the hull in the form of fenders.
And to top of the bulwark, is the top rail.
 
Starting to look like a boat now.
Now here is where things get serious. It's time to build the deckhouse and wheel house. This honestly took me for ever, cutting out so many small and intricate parts. What with my huge fingers, it's quite hard. But the end results always blow my brain.


And here is this point at where I had to call it a day.

Until Next Time...........
 

Saturday, 19 November 2016

Fishing Boat............


So I've had a unexpected trip away this weekend. Nowhere exotic, just a trip away with my wife Jak to Peterborough for her work. It's better for me to drive her at the moment as she is not 100%. Any way, every cloud has a silver lining as they say. I had the latest addition of Model Rail magazine with a free model kit to build from Scalescenes. It is of a fishing boat. What with building my diorama, I didn't know when I would get to build it. So, I thought I would take it with me, as I would be sitting some long hours in the green room at the TV studios.
There is conveniently a room for guests to do any last minute prep work. A perfect place to lay the keel of my fishing boat.
 
I'm going to try and build it in two days. I've taken pictures on my phone of the build, so here is the progress I've made today.
With the keel laid, sorry cut out, time to fix the cross bulkheads in place.


The hold walls are constructed at this point and finished off with capping.
The deck simply gets set on the top.
 
Infilling the bulkheads are next. These are done by lightly scoring the card so you can bend and manipulate them into the contours of the hull. 
 
Further hull sides are added to give a more defined form and shape.


Well that's where I got to when Jak came off air at 1pm. I'm back at the studios in the morning, so hopefully I might just get it finished. 
Until Tomorrow.................


Sunday, 13 November 2016

Diorama Update.............


I thought that I’d better let you know just how the diorama is coming along. Well it’s taken over all of the dining room table! What started as a small project to show of my T022a Row of Terraced Houses from Scalescenes, has become a proving ground for Wynyard Lane. If you don’t already know, I’m a complete novice when it comes to layout construction. So the techniques that I’m using on the diorama, will serve me well on the main layout. I will share in a later post, how I found to do a few of the techniques ie: roads, grass and ballast. But for now, here are some pictures of where I’m at.


Until Next Time............

Saturday, 5 November 2016

Finished Low Relief Hotel


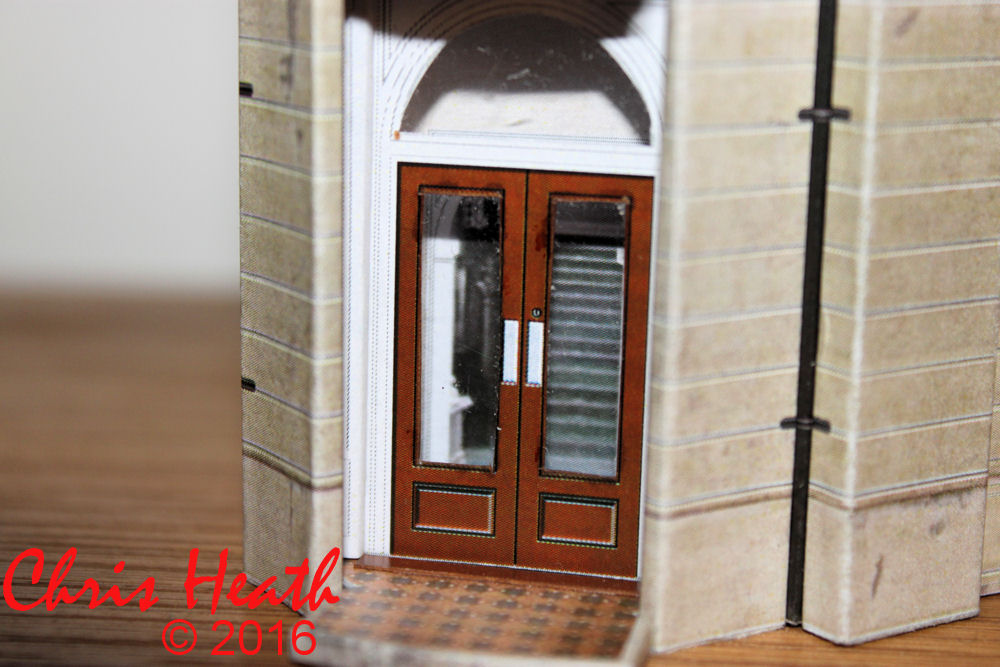
I’m sorry to say that I have finished the T006cLow Relief Hotel from Scalescenes. I know I said it was to be a project for when I was at work on a weekend but, it was just sat in a box on the window sill above my desk and it was screaming at me to finish it. So, during a few lunch breaks and a couple of quiet moments, I set to and completed it. Sorry to say, that I took no photos of the final stages of the build but, I’ve taken some now that I have it at home. If you want a feature piece to sit at the back of your layout, this hotel will sit very pretty indeed. The detail on both the outside and the inside is what I’ve come to expect from Scalescenes.  
 
If you take a closer look inside, the detail is so fine. It makes for a grand entrance to a grand hotel.
 
All in all, I'm very impressed with this kit. Well worth giving it a go.
 
Until Next Time..............

Friday, 28 October 2016

My Blog In Print………….


My humble blog has been put into print. A couple of months ago, I received an email out of the blue by an editor of a magazine. I nearly dismissed it at first, as who would want to read about my blog. But my wife Jak encouraged me to reply to the editor and see want he wanted. It seems that his magazine, Dolls House and Miniature Scene, do a feature every month about a different blog. Now, not doing anything dolls house related on my blog, I couldn’t understand why they would want to feature my blog. But they assured me that the second part of the tittle “miniature scene” was quite apt. So I got my writing head on and penned a few words to explain where Wynyard Lane came from and what it is all about. If you care to get yourself a copy of the said magazine, this is what the front cover looks like, which my article is in.


And if you want to look at what the magazine is about, click on the link below.
https://www.hobbies-and-crafts.co.uk/dolls-houses-miniatures/

Until Next Time............

Thursday, 20 October 2016

Diorama Update.............


Well the diorama has taken over my work table. At first, it was to be a way of showing off the row of eight terraced houses. This would have fit on a display board about 2ft X 1ft. The board is now unfortunately a little larger. It’s now 4ft X 2ft. This is my own fault as I keep getting great and grander ideas for my row of houses. At the moment it comprises of the row of eight terraced houses as the main feature. A row of ten low relief terraced house backs. That back onto the rear of the eight houses. A row of six low relief terraced house backs that run adjacent to the two main streets. At the opposite end to these stands two shops built into two terraced houses. And along the full 4ft length of the board at the back, is a row of viaduct arches, some filled in with shops and workshops. And to finish, going to have a field or park of some kind. I’m now at the point of trailing what I’m going to use for the roads. Here are some pictures of the diorama as it stands.


Until Next Time............