Sunday, 10 December 2023

T040b Lifeboat Station Part 3…………..

Time now for the next instalment of the T040b Lifeboat Station from Scalescenes. I’ve decided to post in small snippets, with this being a rather large build, as trying to show it all in one hit, would be quite a laborious read. 


Talking of large builds, the next step is to cut out two A4 size pieces, the External Side wall base layers. Cut out the windows openings at this point.


Next, cut out the External Side wall cover layers, and glue them to their corresponding base layers.


Wrap the window flaps tightly around the opening and glue into place.


Next, carefully cut out the Window Sills and glue them into place on the bottom of the window.


Cut out the windows next, and glue them centrally within the window openings.


Next, cut out the Internal walls. Again, don’t forget to cut out the windows. Check they fit with their corresponding External walls and glue them together back to back. Set aside with heavy weight on them until the glue dries. 


Time to make the Buttresses next. Cut out Buttresses A,B and C and glue them together into blocks of two. Make sure that fronts are correctly aligned. 


Next, cut out the Buttress fronts. Lay them on a flat surface and using the light blue lines as a guide, glue the buttress sections to their corresponding fronts. Top Tip, using your trusty 4mm spacer from before, you can glue the sides perpendicular to the front. 


Score on the light blue lines and cut out the Buttress cover layers A,B and C. Wrap and glue these around their corresponding buttresses. Set these aside for now.


The next step is to make the steps for the lefthand side wall. Cut out the Steps side wall A and B and glue together. Apply weight and set aside to dry. While these are drying, cut out the two of the Step supports. Then glue one Step supports to the Steps side wall. 


Next, cut out the Step Centres A,B C and D and glue into blocks of two.


Using a small square to keep everything perpendicular, glue the Step centres into place.


Next, glue the remaining Step Support into place. Again, use your square to keep everything perpendicular. 


Cut out all of the steps next and grey marker along the front edge. Starting from the bottom, glue the step 3 into place. Then continue up with Steps 2. Then again with Steps 3 all the way to the top. 


Next, glue the completed steps section to the external side wall. Use your square to keep it true and plumb. 


Cut out Plinths 1,2 3 and 4 and the Plinth spacers next. Mark on the back of the plinths its number. Glue the plinth spacer to the bottom edge of the plinth. Glue the Plinths in to their positions, with the spacer at the bottom to angle out the plinths slightly. 


Finally for this section of the build, glue the Buttresses squarely into their positions on the external wall and glue the Buttresses tops into place. 


And that’s all for this segment. 


Until Next Time……….


Friday, 1 December 2023

T040b Lifeboat Station Part 2……….

Here we go with the second installment of the T040b Lifeboat House from Scalescenes. And it’s not a part I’m looking forward to. It’s the winch for the rear of the Lifeboat house. It’s quite a contrast to the previous part of the build which is huge pieces, which is what I like. These are very small intricate pieces. I shouldn’t really worry about these smaller details, as they are very rarely or never seen. But I feel they need to be done, as the designer has gone to a lot of trouble to produce them. 

Anyway, enough rambling, let’s make a start.


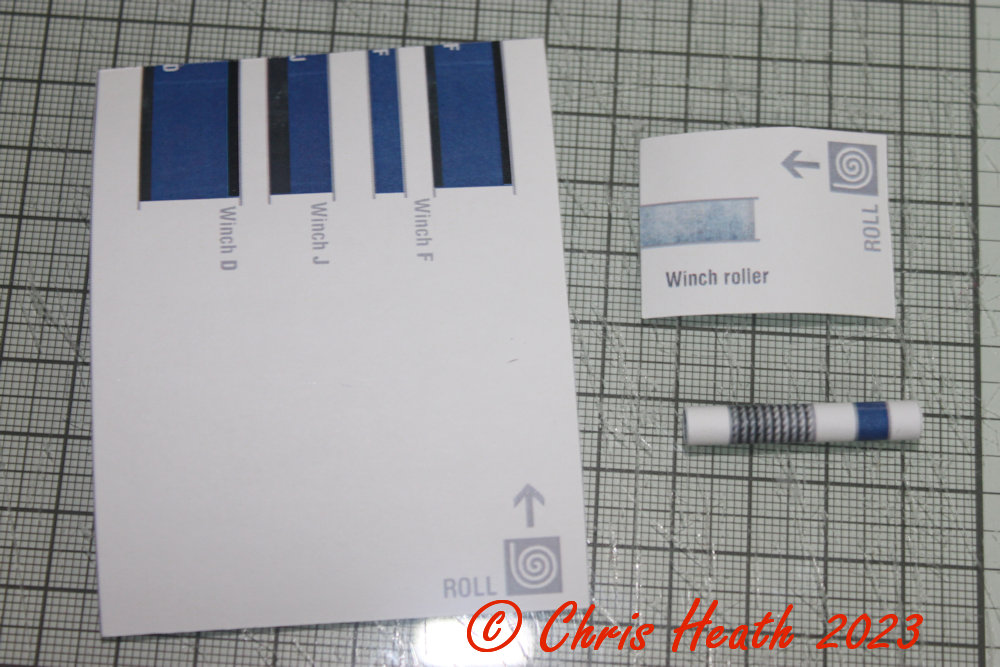
First job is to roll all of the rollers. I always use self-adhesive labels for my builds, but for these elements I find it easier to print onto plain old copier paper. It tends to roll up much easier and tighter. While the glue is drying on the rollers, cut out all of the constituent parts for the winch. 

Make a discreet mark on each part of the winch pieces, so that you know which part goes where. Just follow the steps and glue the parts into their corresponding location. 


Once the glue has dried, glue into place at the rear of the well.


Next, it’s another fiddly section, the cradle. Cut out the two Cradle centre  A sections and glue back to back. Then set aside to dry. (Sorry, I forgot to take a picture.) Next, cut out and glue the two Cradle side A pieces to the back of Cradle sides B. Ensure that the red edges are both aligned to the top. Run a red marker along the top of the completed edges.


Cut out and glue the two Cradle centre B1 pieces next and glue to the back of Cradle centre B2. Again make sure the arrows are aligned. 


Next, cut out Cradle ends A and B, and glue together. 


Cut out the Cradle centres B and glue to the sides of the Cradle centre A. Apply pressure, and set aside to dry.


While the glue is drying on the Cradle centre A/B, very carefully cut out the Cradle base. 


Now here is where I went a little off piste. I glued the two end sections to the centre section before I glued them to the Cradle base. I did this because I wanted to make sure that the cradle base and the centre section fit in the well. I didn’t fancy cutting the base out again once it was all glued up, if it didn’t fit in the well. Once you’re happy they fit, glue the two together. Make sure that anything glued on top of the cradle base from now, doesn't overhang the base.


Next, cut out and glue the Centre top into place.


Like before with the winch rollers, cut out, roll and glue Cradle rollers. Then glue them into place on the Cradle centre.


Next, cut out and lightly score the Cradle ribs A2, the introduce a slight angle on the red lines. Then glue into place.


Cut the Cradle ribs A1 next and glue over the two Cradle ribs A2.


Next, cut out and glue into place the Cradle tops B into place.


Cut out and glue together the Cradle ribs A back to back next. Once dry, glue into place on the Cradle. 


Next, cut out and glue into place, the Cradle tops A into place.


Make sure that the Cradle sides A fit onto the cradle side. If they don’t, the cradle will not sit in the well. Once they fit, glue into place.


Next, cut out and glue into place, the Cradle ends. Make sure the trough in the centre lines up. And that’s your Cradle done.


That’s where I’m going to leave it for now. I’ll post short little snippets, so as not to bore you with one big hit. 


Until Next Time…………