
Here we go with the second installment of the T040b
Lifeboat House from Scalescenes. And it’s not a part I’m looking forward to.
It’s the winch for the rear of the Lifeboat house. It’s quite a contrast to the
previous part of the build which is huge pieces, which is what I like. These
are very small intricate pieces. I shouldn’t really worry about these smaller
details, as they are very rarely or never seen. But I feel they need to be
done, as the designer has gone to a lot of trouble to produce them.
Anyway, enough rambling, let’s make a
start.
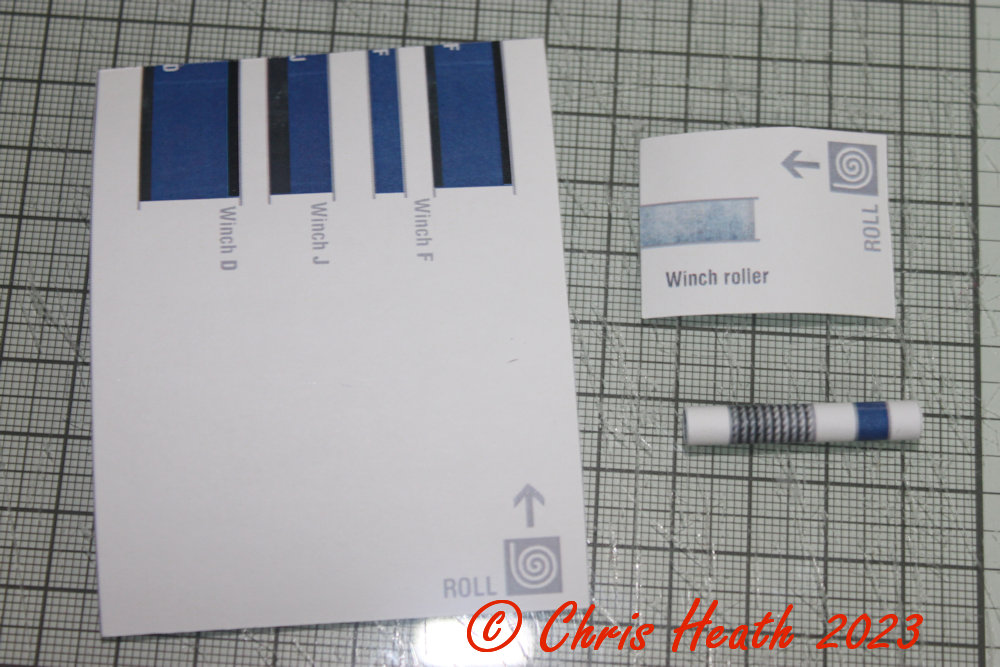
First job is to roll all of the
rollers. I always use self-adhesive labels for my builds, but for these
elements I find it easier to print onto plain old copier paper. It tends to
roll up much easier and tighter. While the glue is drying on the rollers, cut
out all of the constituent parts for the winch.
Make a discreet mark on each part of
the winch pieces, so that you know which part goes where. Just follow the steps
and glue the parts into their corresponding location.
 |
 |
 |
 |
Once the glue has dried, glue into place at the rear of
the well.
 |
|
Next, it’s another fiddly section, the cradle. Cut out the
two Cradle centre A sections and glue back to back. Then set aside
to dry. (Sorry, I forgot to take a picture.) Next, cut out and glue the two
Cradle side A pieces to the back of Cradle sides B. Ensure that the red edges
are both aligned to the top. Run a red marker along the top of the completed
edges.
 |
 |
Cut out and glue the two Cradle centre B1 pieces next and
glue to the back of Cradle centre B2. Again make sure the arrows are
aligned.
 |
 |
Next, cut out Cradle ends A and B, and glue
together.
 |
|
Cut out the Cradle centres B and glue to the sides of the
Cradle centre A. Apply pressure, and set aside to dry.
 |
|
While the glue is drying on the Cradle centre A/B, very
carefully cut out the Cradle base.
 |
|
 |
 |
Next, cut out and glue the Centre top into place.
 |
 |
Like before with the winch rollers, cut out, roll and glue
Cradle rollers. Then glue them into place on the Cradle centre.
 |
 |
 |
 |
Next, cut out and lightly score the Cradle ribs A2, the
introduce a slight angle on the red lines. Then glue into place.
 |
|
Cut the Cradle ribs A1 next and glue over the two Cradle
ribs A2.
 |
 |
Next, cut out and glue into place the Cradle tops B into
place.
 |
 |
Cut out and glue together the Cradle ribs A back to back
next. Once dry, glue into place on the Cradle.
 |
 |
 |
 |
Make sure that the Cradle sides A fit onto the cradle
side. If they don’t, the cradle will not sit in the well. Once they fit, glue
into place.
 |
|
Next, cut out and glue into place, the Cradle ends. Make
sure the trough in the centre lines up. And that’s your Cradle done.
 |
 |
That’s where I’m going to leave it for now. I’ll post
short little snippets, so as not to bore you with one big hit.
Until Next Time…………

No comments:
Post a Comment