Saturday, 11 November 2017

Cargo Ship Update Part 2..........

I’ve had a week off work this week so I’ve had loads of time to crack on with building this Scalescenes ship. If I thought I could get away with it, I think I would be up in the loft a lot more and I could get this ship done in a flash! But I suppose taking my time, and small sessions will make the build enjoyable, rather than a chore. Anyway, back to my progress.

The holds on the bow section are identical in construction to the stern section.
 

“Top tip” When needing to hold a piece in place until the glue sets, you can use a spring clamp. But when you can’t use a clamp, a small wedge cut from a scrap of card, will hold the gangway support perpendicular to the hold side until the glue dries. 

The next hold is a bit of a cheat. To gain some integral strength at the bow, the hold covers will be closed permanently so as not to see the strengthening structure within. The hold covers on this section is in one solid piece. At the same time, you can add the bow deck.
 
 
And with that, the bow section is at the same stage as the stern. Time to bring these two sections together for the first time. And as before, there is a great amount of surface area between the base and the hold ceiling, to achieve a good bond for the two sections.
 
And there you go. Time to clear the workbench so I can fit the complete hull on.
 
 Next it’s the hold lids. These are a simple box construction, a top, a bottom and four sides. Simple.
  
Well it would have been if I didn’t have another eleven to do!!
 
It’s at this stage it’s time to decide which way the build is going. The kit can be either a general bulk carrier, which would mean that the hold covers would be left off for now, and fixed into place once you decide how you want to display the ship, either with the covers open or closed. Or it can be a container carrier, which means the covers need to be fixed down at this stage. I’m opting for the latter, as I’ve already got a load of containers ready made for the ship.
 
Once all of the covers are fixed into place, the hold coaming gets fixed into place. 


The stern deck gets fixed into place now.


The hull is coming together quite well now. The next stage is to fix the hull sides into place. Now that will have to wait until the next post. 


Until Next Time............


Thursday, 9 November 2017

Modern Ship Update....................


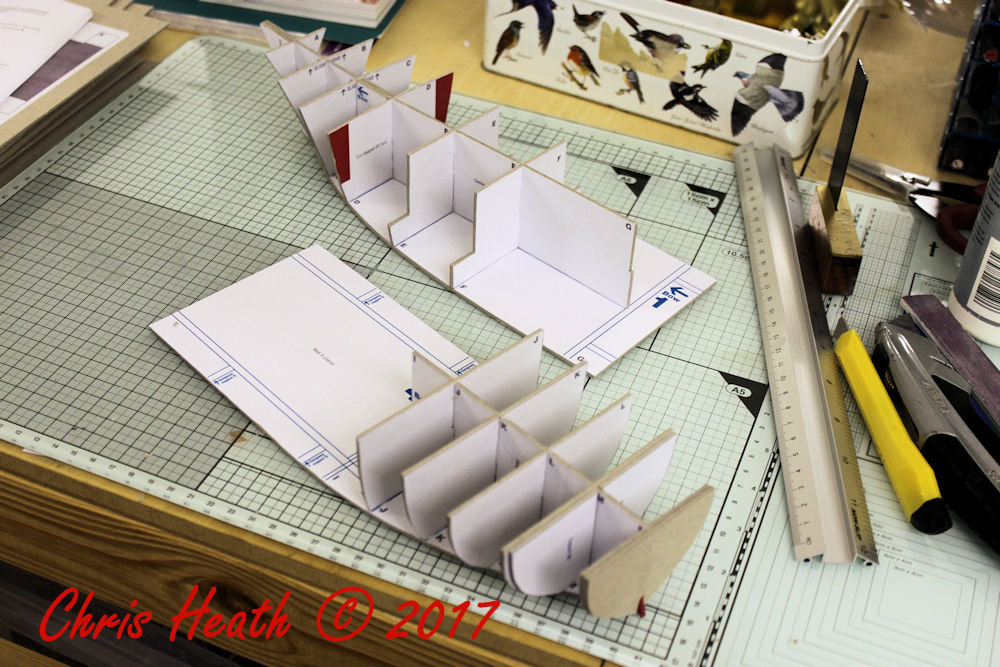
Time for an update on the T030c Modern Cargo Ship from Scalescenes. In the last post I made, I'd managed to complete the backbone of the bow section of the ship. The next stage is to build the aft or the stern section. I don’t think you need to see the process, as it is of the same construction to the bow section. 
 
Now that the stern and bow sections are constructed, it’s time to start adding the bulkheads for the holds. Now, on the first of the aft bulkheads, there are doors to add. Not sure how visible these will be once the ship is finished but, as with all Scalescenes models, the fine detail is amazing. 
 
Once the bulkhead is in place, it’s time to start with the hold sides and floor. Just for future information, the floor of the ship is called the ceiling. As you progress down the vessel, the base boards are cleverly staggered with the hold ceilings. This ensures that you gain maximum bonding surface for integral strength. 
 
As you can see in the above picture, the layout lines could not be clearer. This makes putting this kit together a dream.


The sides are cut away the receive the next bulkhead. The bulkheads also have  the gangway supports built in. 
 

“Top tip” as you can see in the above picture there's a pencil line on the hold side. This is a reference I made when I was test fitting the hold sides. Once I have test fit all of the hold sides and each pair of sides have a unique set of lines, I then know which ones get glued together. 
The hold outer sides are put in place at this stage and the joins in both the gangway and the hold sides, are covered with joining strips.
  
Well that’s as far as I can go with the aft section, time to do it all over again with the bow section. 

Until Next Time...........


Thursday, 2 November 2017

Modern Cargo Ship...............


After months of waiting, it finally got released, the new T030c Modern Cargo Ship from Scalescenes. This is one I've been eagerly waiting for. I’ve built al of the T030a fishing boats, the T030b Clyde Puffer and built two of the T030 Cargo ships. One of the T030’s built to spec and the other I kit bashed and made it into a more modern bulk carrier. This one is a little bit modern to go onto Wynyard lane but, I currently work at a port where we regularly discharge vessels of this type. So this one might just take pride of place on my widow sill in the office. It can be built in two different guises, it can be a general bulk carrier, with moveable hatch covers. Or it can be configured to be a costal container carrier. I’m opting for the latter for now, simply because I have already made quite a substantial amount of containers in preparation (I may have had some insider information into what cargoes this ship might be carrying).
So here we go. Let’s hope that I have enough space to build this, as it is almost one metre in length and that my tennis elbow doesn’t flare up.
In the first couple of pictures, it shows just how little space I have at the moment and just how much there is of this kit.
 
Right let’s ceremonially lay the keel. This is the sixth ship built in this ship yard. I’ve read through the instructions, and there doesn’t seem to be any out of the ordinary techniques. So hopefully this build should be plain sailing (pardon the pun).
Once the keel is sitting on a level surface, you start to fit the bulk heads to the centre section and fit it to the keel.
 
Not much done in this session, but hopefully I’ll get a lot more done over the weekend.
Until Next Time……………


Friday, 13 October 2017

Fishing Fleet......................

While waiting for the new Modern Cargo Ship being released from Scalescenes, I've been in the loft and finished the trio of T030a fishing boats. I've had two built for a while, and they take pride of place on my Grandson's bedroom shelf. In order to make sure my elbow was up for the job, I thought that I might as well complete the set. They come in three colours, Black, Blue and the one I've just finished, Red. While up in the loft, I rounded up the other vessels that I've made. Two of the T030 Cargo Ships. The first was built as the kit comes, but the second was kit bashed and made into a more modern bulk carrier. The other boat is the T030b Clyde Puffer. Altogether I'm building up quite a fleet. 
 
 
I can't wait for the new release to come out. I've got itchy fingers now, and touch wood, my elbow is holding out.

Until Next Time..............