Saturday, 12 January 2019

Industrial Box File Part 2............


Right, now that all of that technical track and hardstanding business is out of the way, it’s now time to have fun and construct some buildings.
The first part of the building process of the Scalescenes LY01 Industrial Boxfile Layout is the rear wall. This cleverly incorporates a interior back scene for the rear. This will become very effective later, especially if lights are used.


The length of the back is too long to be printed onto one A4 so, a second shorter section is to be butted up and glued with the main section. The may or may not hold together whilst you are handling the piece and putting it together, so I strengthened the join with a piece of masking tape glued over the joint.


Major supporting walls and platform supports are fixed into place next. Note the two squares used to keep everything square and perpendicular. If you start with everything square and level, it’s make neat progression so much easier.
 
While the glue is drying on the walls, it’s time to put the platform walls and the platform in place.


Finished off with a sturdy platform edge.
Set that all aside now to dry, and start making the front façade.
 
 
Is it just me, or does everyone colour the slightest bit of white raw edge? Even on the window sills.


Windows next. And I’m fortunate to have at my disposal a range of Scaleglaze windows. These make the model making process so much easier, if like me you struggle to cut out the fine detail of the window frames. These are readily available from the Scalescenes website and are fantastic quality.
 
 
The front of the building is glued in place next.
 
 
It’s starting to look a bit dramatic now.
 
There’s an outside platform made next. (Sorry I forgot to take the pictures)
 
A bit of fine detail with the drainpipe and doors next, and it’s taking shape.


With the addition of the support wall on the right, that’s about it for this section.
 
 
Time to fix it in place on the back wall.
A little back scene for in the corner has been fixed in place at this point.


Oh! I forgot. There’s a roof to go on.
 
 
Also note to the right of the picture, I’ve cut out the middle section of the roof and fashioned a rudimentary hinge from masking tape. This could be a neat little place to hide away any lighting battery pack.
 
 
That’s all I have to show you at the moment, but I’m making progress with the structure to sit on the top of the right hand side.
 
Until Next Time......……


Tuesday, 8 January 2019

Industrial Box File..............


Right, here we go again. As promised, I’m going to have a go at the LY01 Industrial Box File Layout from Scalescenes. I know I’m a little slow off the blocks with this one, as many people out there have already completed some fantastic models, but I’ve been busy over Christmas at work and spent some quality time with the family.
 
Firstly, I needed to source a box file. I managed to find mine in a local branch of Ryman’s, the price wasn’t too bad either. I must admit, I couldn’t resist the 4 for the price of 3 deal. So hopefully once I master this one, I should be able to have a kit bash at another couple.

It’s a standard size Foolscap box file. 
Firstly take off all of the clips and brackets so you have a clear space to fill with the kit.
 
Next you need to cut the box to accommodate the track coming in. There is a handy cutting jig in the kit to make sure the cuts are in the right place. 
 

Next some 2mm cork underlay. This was a bargain off of the internet. I got 6 x1m rolls for just over a fiver. This gets cut to size and the glued to the bottom of the box.
 
Once you’ve established where the buildings are going, it’s time to lay some track. I’ve just used some old flexible track with missing sleepers, as you will only see the track and not the sleepers once the hard standing is in place.
If you print off a second low quality black and white copy of the hard standing and lay the track over the top, it’s easier to mark out where to cut and use it as a paper template to cut the final hard standing.
 

Once the track is glued to the cork base, transfer the paper templates onto the final sheets of the hard standing and cut them out carefully. Glue these down so as to just have the rails exposed in the concrete. 


That’s where I managed to get to over Christmas. I’ve now started the first of the buildings. The long section to cover the complete back of the box file. 
Hopefully by the weekend I should have made enough progress to show you what I’ve done. 
Until Next Time.........


Thursday, 13 December 2018

I'm Still Here.............


Just to let you all know, I haven’t left you. I might not of been posting on here but, I have still been building a model. There’s been a lot going on in my life what with work and home, so having the luxury of time to chart the progress of a build, I haven’t had a lot of that. I did find time however back in November, to visit the Warley Model Railway Show held at the NEC in Birmingham. I’d never been before, so wasn’t prepared for the vast array of fantastic layouts on display. I had arranged to meet up with John Wiffen, the brains behind Scalescenes, and he and I had a fantastic day ambling around and scrutinising the superb layouts on display. I must say I was well inspired, and I wish I had the time to put all of the ideas that I gleaned from the show, onto my layout.


I haven’t posted anything since back in August, when I finished the Scalescenes R007a Crossing Keepers Cottage, I have however, built a model. It was another version of the T030c Modern cargo ship.I wanted to build it to my own specifications, as I work at a local port, and some of the vessels that we deal with are very similar to the Modern Cargo Ship. So, with John’s permission, and a lot of help from him and my wife, I managed to manipulate the kit to near enough the correct colour for the shipping company I wanted.


I also wanted the hatches to be moved by a hatch gantry crane, rather than slid along and concertina for loading and discharge.


So a gantry crane was fashioned from Evergreen plastic.

The cargo is to simulate a dry cargo of Urea. A base product that goes into a wide range of finished products, from animal feeds, glue and Ad-blue to name a few. My version is made from Das White Modelling Clay.
I’m building up quite a fleet now, what with the two original T030 cargo ships, the T030a fishing fleet, the T030b Clyde Puffer and the two T030c Modern Cargo ships.


I’m hoping to get back on track with blog after the turn of the year. I’ve got the latest release from Scalescenes, the LY01 Industrial Box File Layout and I’m hoping to make a start with that over the Christmas period.


Whilst I’m on, I might as well remind you, that if you have that hard to buy for Dad, Grandad, Brother or indeed anyone who likes to make models, there are Gift Certificates available from Scalescenes. Just click the link. They are for any amount and don’t ever expire. Just let them order what and when they want. Perfect!


Can I also take this opportunity to wish everyone good health and happiness over the festive period, and to have a prosperous 2019.

Until Next Time......…


Sunday, 26 August 2018

Finished Crossing Keepers Cottage........

Now that all the walls have been built its now time to put them all together. It’s very important at this stage, to make sure that everything is square. A small block square is fine for making sure the walls are perpendicular, but I found two combination squares put together, holds all the structure square while the glue sets.


The extension is next. The walls are of the same construction as the rest of the building, two side walls, one with chimney built into it, and a gable wall.
When I fixed these to the main structure, I wanted to make sure these were also square. The way I done it, was to cut a scrap piece of card the same width between the two walls at the gable end. So when I glued the walls to the main building, I use the same piece of scrap card as a spacer to keep the structure square.   
 
 
On with the ceilings next. These also incorporate the guttering. 
 

Once the ceilings are in place, it’s time to construct the roof. Lots of rows of slates. 
 

The cottage has two roofs. The transition between the two on this kit, has a simple but clever addition of valley flashing. 
  
 
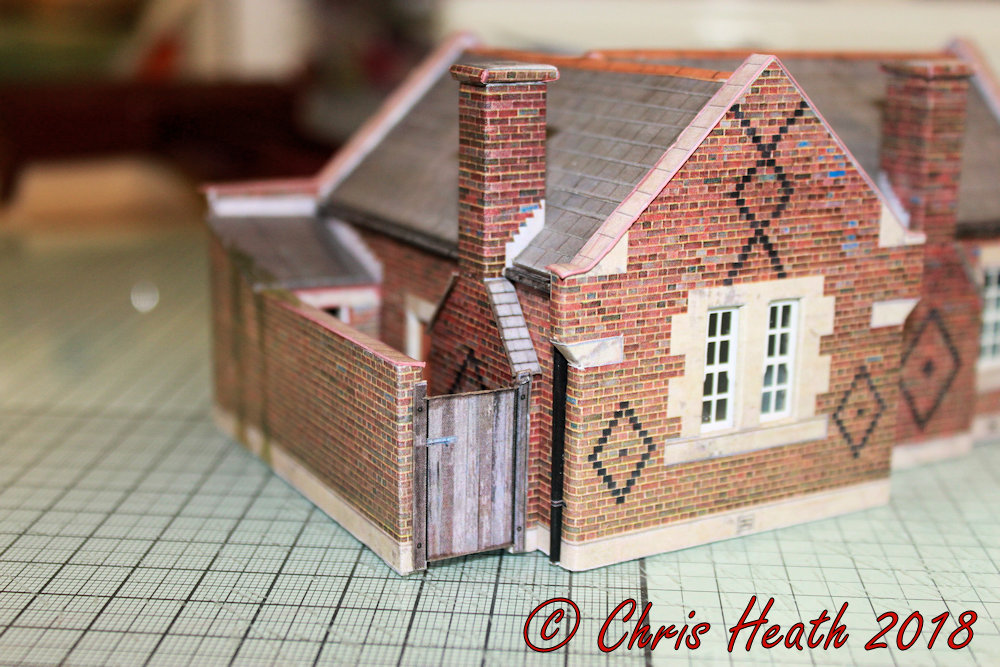
The outbuilding wall is next. And there’s no lack of detail here either. Down to detailed door frames. And a piece that I personally like, is a baton gate.


Finally to put on all of the gable coping stones and the chimney capping, and that’s it. 


I like this little cottage. It’s got me back to my craft table. It hasn’t taken too long to build and it would be a great kit for a beginner. It’s the first time I’ve used the Scaleglaze windows, and I think they are a fantastic addition the Scalescenes range. 

I’ve got the bit between my teeth again now, and my next project is to build another modern cargo ship. As a general bulk cargo carrier.  Watch this space. 

Until Next Time...........