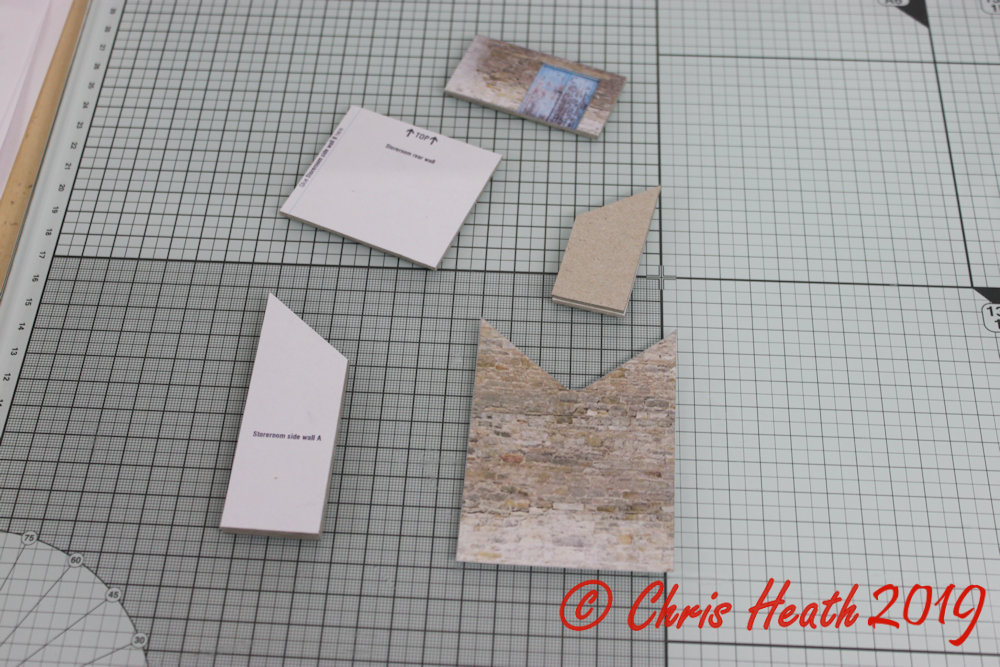
Right, here we go. I’m about to start on the long awaited
T023 Fire Station from Scalescenes. I’ve waited patiently for this kit for some
time now. I’m a little slow out of the blocks to get started though, as I’ve
had the kit since it’s release, but I’ve just managed to get started this
weekend, due to work and my Grandson Jack’s birthday.
I’m looking forward to see how this kit progresses, as
I’ve had a little input in its design. I think John at Scalescenes has hit the
nail right on the head with this kit. There was a short list of three designs
that he’d chosen, and in my opinion, he’s chosen the best one.
First, like always, I affix all of the sheets to the
respective thickness card stock. Ensuring to omit any air bubbles with a rubber
brayer.

 In don’t totally cut out the window / door openings, I
like to leave the last cut until it’s fixed to the base layer. This helps to
keep the cover layer square, especially when applying large areas like the
front doors, which you will see shortly.
In don’t totally cut out the window / door openings, I
like to leave the last cut until it’s fixed to the base layer. This helps to
keep the cover layer square, especially when applying large areas like the
front doors, which you will see shortly.


 The lower window openings get covered with the sills, but
the top of the window is raw card. I like to colour the raw edge with a marker.
The lower window openings get covered with the sills, but
the top of the window is raw card. I like to colour the raw edge with a marker.


 Once again, I’ve used Scaleglaze windows for this kit. I
can’t recommend these window enough. They look brilliant and save an eternity
of time, with not having to cut out all of the windows.
Once again, I’ve used Scaleglaze windows for this kit. I
can’t recommend these window enough. They look brilliant and save an eternity
of time, with not having to cut out all of the windows.

 The front façade along with the front doors are next.

 This is where leaving the cut out intact comes into play.
Keeping the cover layer square with the doorway cut out is virtually
impossible.
This is where leaving the cut out intact comes into play.
Keeping the cover layer square with the doorway cut out is virtually
impossible.

 A little interior detail with some radiators.

 You might be able to see the two copper tapes running
through the gable end wall. I do intend to illuminate this kit, but as yet, I’m
not sure how and where the lights will be. So at least running the tape
through at this stage, gets it hidden inside the wall. I’ll worry about how to
run the electric to the lights later. (Maybe I should do more planning).
The door fronts and backs are cut out next and glued
together. I’ve opted to have both doors opening.
You might be able to see the two copper tapes running
through the gable end wall. I do intend to illuminate this kit, but as yet, I’m
not sure how and where the lights will be. So at least running the tape
through at this stage, gets it hidden inside the wall. I’ll worry about how to
run the electric to the lights later. (Maybe I should do more planning).
The door fronts and backs are cut out next and glued
together. I’ve opted to have both doors opening.

 You can have the doors closed
option Once the glue is dry, fix in the door frame.
You can have the doors closed
option Once the glue is dry, fix in the door frame.
 The main stairwell comes first. The staircase
unit has a 90 degree turn and this will make an under stairwell void for the
fire kit racks.
The main stairwell comes first. The staircase
unit has a 90 degree turn and this will make an under stairwell void for the
fire kit racks.
 The unit also incorporates the pole shaft.
Make sure everything is square and true at this stage.
Making adjustments at this stage, is a lot easier than trying later when it’s
too late.
The unit also incorporates the pole shaft.
Make sure everything is square and true at this stage.
Making adjustments at this stage, is a lot easier than trying later when it’s
too late.

 It’s a shame that the staircase will not be seen, when
John has gone to the trouble of designing it. Maybe it could be illuminated?
Let’s have a look into that.
It’s a shame that the staircase will not be seen, when
John has gone to the trouble of designing it. Maybe it could be illuminated?
Let’s have a look into that.
 The Fire tunics are next. They may be a small
insignificant piece, but it’s this attention to detail that I love from
Scalescenes.
The Fire tunics are next. They may be a small
insignificant piece, but it’s this attention to detail that I love from
Scalescenes.

 Along with the picture of the helmets and boots, it looks
spot on!
Along with the picture of the helmets and boots, it looks
spot on!
 Time to fashion a Fireman’s pole next. After searching my
stash of evergreen section and florists wire, I couldn’t find anything
suitable. However, I did find this.
Time to fashion a Fireman’s pole next. After searching my
stash of evergreen section and florists wire, I couldn’t find anything
suitable. However, I did find this.

 A giant paper clip. Perfect.
Some doors on one of the walls staircase walls next, and
that’s the staircase done.
A giant paper clip. Perfect.
Some doors on one of the walls staircase walls next, and
that’s the staircase done.
 Wall buttresses next.

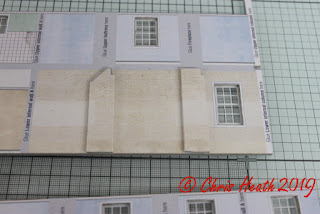 Once these are in place, fit the complete staircase
module in place.
Again, check everything is square and true.
Once these are in place, fit the complete staircase
module in place.
Again, check everything is square and true.
 Starting to come together now. The other main wall and
the the upper floor with a dividing wall is next.
Starting to come together now. The other main wall and
the the upper floor with a dividing wall is next.

 I love detail in the back of this appliance room.
 The upper staircase wall with its banister is next.

 The problem I’m facing, is that I want to hide any ground
floor lights, so that you don’t see them through the first floor windows.
The problem I’m facing, is that I want to hide any ground
floor lights, so that you don’t see them through the first floor windows.
 This is the best I could come up with. One housed in the
pole shaft, that will not be seen. One a small room in the corner, which can’t
be seen through the window. And the only one I couldn’t hide, is a flashing
blue light for the appliance room. But this wire will be run up the wall. It’s
a compromise I’ll have to cope with.
The fireman’s pole entry doors are next.
This is the best I could come up with. One housed in the
pole shaft, that will not be seen. One a small room in the corner, which can’t
be seen through the window. And the only one I couldn’t hide, is a flashing
blue light for the appliance room. But this wire will be run up the wall. It’s
a compromise I’ll have to cope with.
The fireman’s pole entry doors are next.

 These small and insignificant doors mean something to me,
as these are the actual doors from the fire station I worked at. I took the
photograph and sent it to John, and he has kindly used them in the kit. They
look brilliant in situ.
That’s it for now. I intend to knuckle down and make
headway with this kit over the next week.
Until Next Time.............
These small and insignificant doors mean something to me,
as these are the actual doors from the fire station I worked at. I took the
photograph and sent it to John, and he has kindly used them in the kit. They
look brilliant in situ.
That’s it for now. I intend to knuckle down and make
headway with this kit over the next week.
Until Next Time.............

Well there you go.
I’ve finished the T029 China Loading Facility, the latest release from
Scalescenes. I’ve really enjoyed this kit. It has a few new features in the kit
including, new box construction techniques, new sliding doors, a corrugated
sheet making jig and a new texture for the storeroom roof, with lichen.
I’ve took my time (for once) to plan and incorporate
electrics in this build. And I have to say, I’m more than pleased with the
results. The running of the self adhesive 6mm copper tape throughout the building
is so easy. It can be hidden between two base layers, and even under a cover
layer, it’s that thin! There is no soldering of joints, the tape just sticks
over it’s self and makes the connection. All it takes is a little thought in
the initial stages, and it couldn’t be easier. I can see me rebuilding all of
my Scalescenes kits with lights. The lights are just run from a battery at the
moment, but when the building is put in its final resting place on a layout, it
can be easily hard wired, as the inlet is underneath in the base.
The lights I’ve used are 3mm warm white pre wired led lights,
as they give a softer, less harsh light.
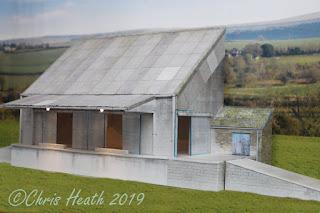
Well here it is in all of its glory. It’s not in its
final resting place, it is in fact, it’s still sitting on my work bench, but
I’ve placed a backdrop behind it and I've photoshopped some grass around the sides
and front.




 I like this kit, I like it a lot, but I’m eagerly
awaiting the next release. It is the long awaited Fire Station. I’ve waited
patiently for a couple of years now for this kit, and hopefully it’s out early
July. I can’t wait.
I like this kit, I like it a lot, but I’m eagerly
awaiting the next release. It is the long awaited Fire Station. I’ve waited
patiently for a couple of years now for this kit, and hopefully it’s out early
July. I can’t wait.
Until Next Time..............

Here we go with a big push to the finish line. This post
will be a little longer than a normal post, as I had a day off work and nobody
at home, so I ensconced myself in the loft and set to and made good progress.
As you know I’m building the T029 China Clay Loading Facility from Scalescenes.
With this kit I’m having a dabble with lighting. So I’ve had to take my time
and plan where the lights and electrics have to go. I’ll tell you all about
that part when we get to that stage. Also in this kit, Scalescenes have a new
jig to make corrugated sheeting. Again more on that as we come to it.
Firstly this time, it’s time to make all of the doors for
the facility. Both the backs and the fronts are glued together, and run a
marker around the raw edge.

 Top tip, when cutting out notches and or glueing two
sections with notches together, make yourself a small peg out of two pieces off
the same material that is eventually going into the hole. In this case it’s two
x 2mm card stock and two cover layers. This tip is two fold, 1, it makes sure
you’ve cut the notch wide enough and 2, it aligns the two pieces as the glue
sets.
Top tip, when cutting out notches and or glueing two
sections with notches together, make yourself a small peg out of two pieces off
the same material that is eventually going into the hole. In this case it’s two
x 2mm card stock and two cover layers. This tip is two fold, 1, it makes sure
you’ve cut the notch wide enough and 2, it aligns the two pieces as the glue
sets.


 Once the glue sets, fix it in place on the front of the
building. Don’t forget to fit the doors in the channels, it will be too late to
put the in place later.
Once the glue sets, fix it in place on the front of the
building. Don’t forget to fit the doors in the channels, it will be too late to
put the in place later.

 The canopy is next. This is where it starts to become
interesting. Now I’m not an electrician, so don’t judge me. I’ve decided to
have two lights under the canopy. I’m using 3mm Warm white led’s. Having
decided where to place the lights, I’ve made the holes with a 2.5mm hole punch.
This makes a nice tight fit for the led’s, and these get fixed with a dollop of
hot glue. The “wiring” is 6mm sticky backed copper tape. I used this to great
effect on my last build. It’s so easy to hide and fit the tape between layers
and route it all over the building.
The canopy is next. This is where it starts to become
interesting. Now I’m not an electrician, so don’t judge me. I’ve decided to
have two lights under the canopy. I’m using 3mm Warm white led’s. Having
decided where to place the lights, I’ve made the holes with a 2.5mm hole punch.
This makes a nice tight fit for the led’s, and these get fixed with a dollop of
hot glue. The “wiring” is 6mm sticky backed copper tape. I used this to great
effect on my last build. It’s so easy to hide and fit the tape between layers
and route it all over the building.


 Once the canopy is fitted, it’s a simple case of routing
the copper tape from the canopy, over the rafters to the back of the model
ready for the lights on the back of the building.
Once the canopy is fitted, it’s a simple case of routing
the copper tape from the canopy, over the rafters to the back of the model
ready for the lights on the back of the building.

 These were fitted the same as before. The copper tape
will be routed to the power source shortly.
These were fitted the same as before. The copper tape
will be routed to the power source shortly.
 This next stage is the one I’ve been eagerly awaiting.
It’s the creation of the corrugated panels using the new jig.
Now I suggest that you print out a test page in low
quality and grey scale to use as a sacrificial practice piece. It’s not a hard
process, but there is a fine line between embossing and cutting through the
sheet. Getting the right pressure is critical. Once masted, move onto the good
sheets.
The instruction that come with the kit are very clear,
but here is my take on the task.
Firstly, cut out all of the strips of sheets.
This next stage is the one I’ve been eagerly awaiting.
It’s the creation of the corrugated panels using the new jig.
Now I suggest that you print out a test page in low
quality and grey scale to use as a sacrificial practice piece. It’s not a hard
process, but there is a fine line between embossing and cutting through the
sheet. Getting the right pressure is critical. Once masted, move onto the good
sheets.
The instruction that come with the kit are very clear,
but here is my take on the task.
Firstly, cut out all of the strips of sheets.
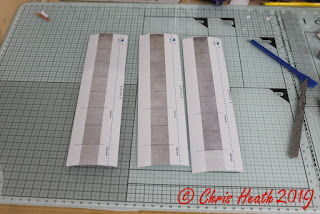 Next fold along the marked score line.
 Place the scored edge under the jig and apply firm
pressure.
Place the scored edge under the jig and apply firm
pressure.
 Carefully wrap the sheet around the jig and place the
second piece of the jig over the sheet. Apply firm pressure to the second piece
and secure the sheet in place.
Carefully wrap the sheet around the jig and place the
second piece of the jig over the sheet. Apply firm pressure to the second piece
and secure the sheet in place.


 Now here is where the practice pays off. Run the supplied
embossing tool along length of the sheet in the first groove, gently. Too much
pressure and the sheet will tear. Repeat the process for all of the grooves.
Now here is where the practice pays off. Run the supplied
embossing tool along length of the sheet in the first groove, gently. Too much
pressure and the sheet will tear. Repeat the process for all of the grooves.
 Once you’ve embossed all of the grooves remove the the
sheet and admire your work. Repeat with the rest of the sheets.
Now that you’ve embossed all of the sheets, cut them to
the required lengths.
If you’ve mastered the technique, like me, you’ll like
the results.
Now that you have all of the corrugated sheets embossed
and cut out, you have a choice. Having tried a test piece first and a
discussion with John at Scalescenes, he advises that you butt the joints of the
sheets together, I’m afraid I disagree, I slightly overlapped the sheets as
would of been done in reality. There is enough wiggle room to do this as you
cut off any excess at the end. The choice is yours, both work equally well.
Firstly, carefully glue the respective sheets to the
awning roof. Be aware that there is a slight overlap at the bottom of the roof.
This is intentional.
Once you’ve embossed all of the grooves remove the the
sheet and admire your work. Repeat with the rest of the sheets.
Now that you’ve embossed all of the sheets, cut them to
the required lengths.
If you’ve mastered the technique, like me, you’ll like
the results.
Now that you have all of the corrugated sheets embossed
and cut out, you have a choice. Having tried a test piece first and a
discussion with John at Scalescenes, he advises that you butt the joints of the
sheets together, I’m afraid I disagree, I slightly overlapped the sheets as
would of been done in reality. There is enough wiggle room to do this as you
cut off any excess at the end. The choice is yours, both work equally well.
Firstly, carefully glue the respective sheets to the
awning roof. Be aware that there is a slight overlap at the bottom of the roof.
This is intentional.
 Once complete, glue the roof in place and finish off with
the side capping.
Once complete, glue the roof in place and finish off with
the side capping.


 Now fit the main roof without the sheeting. Once in
place, again carefully glue the sheeting in place. Taking care to align the
sheets with the awning sheets. Again, the is a slight overhang.
Now fit the main roof without the sheeting. Once in
place, again carefully glue the sheeting in place. Taking care to align the
sheets with the awning sheets. Again, the is a slight overhang.
 Once the main roof is in place, put the sheets on the
gable end panels and fit in place.
Finish off with the side capping.
Once the main roof is in place, put the sheets on the
gable end panels and fit in place.
Finish off with the side capping.


 Glue the door rails together next and set aside.
 Construct the platform base, making sure you
keep it square.
Construct the platform base, making sure you
keep it square.

 While the base is drying, glue the two platform sections
together and put the cover layer in place. Make sure the two door channels are
clear from glue and debris. This will impede the door operation.
While the base is drying, glue the two platform sections
together and put the cover layer in place. Make sure the two door channels are
clear from glue and debris. This will impede the door operation.

 Decide whether you are making a left or right platform,
wrap the respective cover layer around the base, and glue on the platform top.
Decide whether you are making a left or right platform,
wrap the respective cover layer around the base, and glue on the platform top.
 Fit both sets of door rails, again, remember to
put the doors in place first. Check the doors operate before the glue dries.
Fit both sets of door rails, again, remember to
put the doors in place first. Check the doors operate before the glue dries.

 I now had to decide where I was going to put the power
unit, so I cut out all of the constituent parts for the storeroom.
I now had to decide where I was going to put the power
unit, so I cut out all of the constituent parts for the storeroom.
 I routed the copper tape down to the storeroom ready to
go through the wall.
I routed the copper tape down to the storeroom ready to
go through the wall.
 I’ve just used a 12v battery and holder for now.
Ultimately, when it gets its final home on a layout, it will be hard wired. But
for now, it will be switched from behind.
I’ve just used a 12v battery and holder for now.
Ultimately, when it gets its final home on a layout, it will be hard wired. But
for now, it will be switched from behind.


 Once all of the connections are made and tested,
all the walls are put in place, and the guttering added
.
Once all of the connections are made and tested,
all the walls are put in place, and the guttering added
.


 I really like this new lichen encrusted slates. They’re
even numbered to keep them in order.
Trim off the excess from the end.
I really like this new lichen encrusted slates. They’re
even numbered to keep them in order.
Trim off the excess from the end.


 Test and fit the roof in place.
And finish off with the barge boards.
Test and fit the roof in place.
And finish off with the barge boards.

 And that’s the main structure complete. The only things
left to complete the kit, is to construct two access ramps. Hopefully I’ll get
them done at the weekend, and I’ll show
you the finished model then.
Until Next Time.............
And that’s the main structure complete. The only things
left to complete the kit, is to construct two access ramps. Hopefully I’ll get
them done at the weekend, and I’ll show
you the finished model then.
Until Next Time.............