Here we
go again with the next Facade for the new kit from Scalescenes, the T004 Shops
on a Slope. This this time I’m building Facade A2. Enough of the chat, lets get
started.
As always, cut out the Facade
base layer and glue the Facade cover layer squarely over the top.
Top Tip, You might
notice that I’ve not totally cut out the windows. I cut the headers and the
sills out, but I leave the wall flaps intact. This helps, especially when it’s
a larger piece, to keep control of the cover layer. It stops it bending and
flexing and getting stuck to the base layer as you try to get it central. Once
the cover layer is in place, I just cut the flaps then wrap the walls in place.
Cut the
sills out next. Run a marker pen along any raw edges to help the sill blend in.
Then glue into place.
Next, cut
out the Keystones and glue into place over the windows.
The
windows are next. Again I’m using Scaleglaze windows. These are Scaleglaze 1 Two
each of Windows E ad G. Glue centrally into the openings.
Next is
to cut out and glue into place your choice of Shop Overlay. I’m using A2 for
continuity.
Cut out
the Upper Downpipe base layers and cover layers next. Wrap the cover layer
around the base layer and set aside to let the glue dry totally.
Next cut
out both the Inner Buttress base and cover layer and wrap together.
The Outer
Buttress’ are next. Cut out and wrap as before with the Inner Buttress’. But
don’t glue the wall edge just yet. This will wrap around the wall when in situ.
Glue the
Outer Buttress into place next.
Check that the glue is totally dry on the Downpipes
and cut away the blue hatched area. The fit and glue to the inside of the Outer
Buttress. Matching up the brackets on the wall and the
drainpipe. Then fit and glue the Inner Buttress into place.Next is
the shop sign. First cut out and fit the Facia support. Cut out and wrap your
choice of shop sign over the Facia Base Layer. Then glue into place on the
Facade. Making sure that the sign leans forward slightly.
Cut and
glue the Corbels to the top of the columns.
The
plinth is next. Wrap and glue your choice of plinth cover layer over the base
layer. Then glue into place on the Facade.
Cut out
the Leader Heads. Run a marker pen around the edges. Then glue into place.
Next is
to fill your shop with any interior detail you are planning to put in there.
Once filled, glue the finished facade squarely into place. Aligning the top and
the side.
Now it’s
time to get the scaffolding out and make a start on the roof. Start by cutting
out the Cap1 and Cap2 base layers and cover them it’s their corresponding cover
layers. Then glue Cap2 over Cap1. Glue into place.
Cut out
the Roof Support2 and the three Roof Supports1 next. Glue two Roof supports1
back to back, and the third glues to the back the upper facade. Fit and glue
all of the Roof Supports into place.
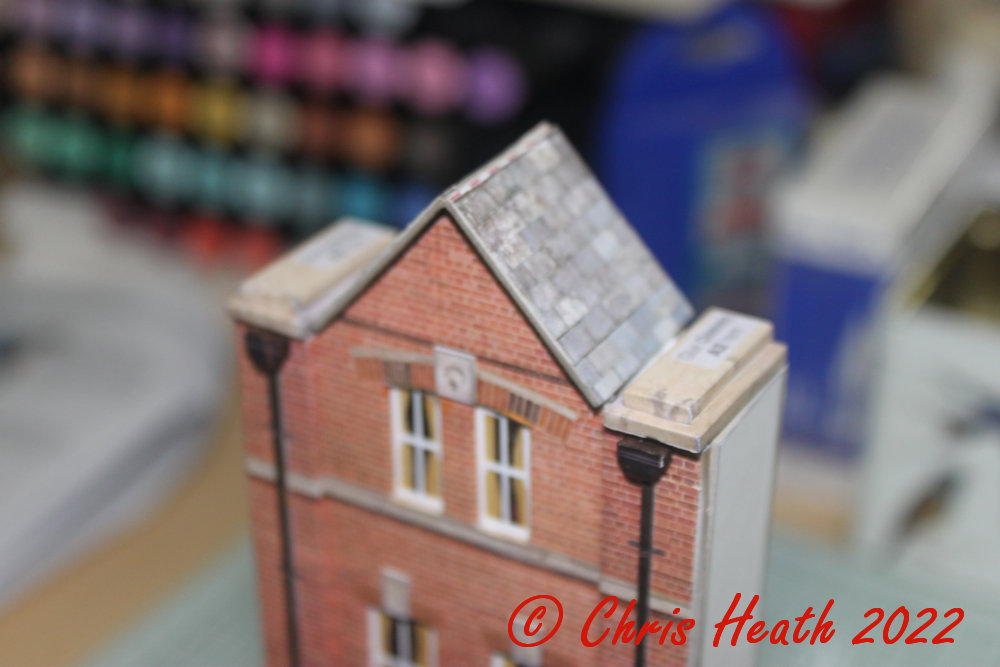
The roof
is next. Cut out the Roof base layer. Cut out all of the rows of tiles and keep
them in numerical order. Starting at the bottom with #1 Glue the strips into
place. Trim off all of the overhanging edges. Then fit the roof into place.
Cut out
the Soffits and Bargeboards next and glue into place. Then finish off with the
Ridge Capping.
Cut out
and glue the Sidewall overlays into place.
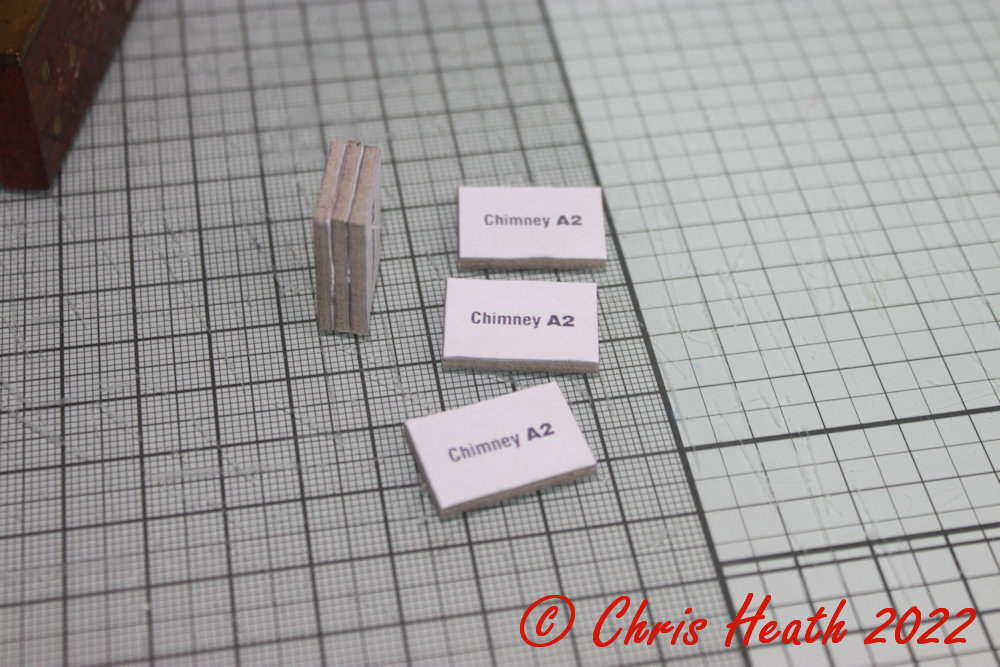
Next, cut
out and glue the Chimney Base layers into two blocks of three. Set aside to dry
while you cut out the Chimney cover layers. Once the glue is dry, wrap the
cover layer around the chimney base. Cut out the Chimney Cap base layers and
wrap with the corresponding cover layer. Glue the cap onto the chimney and glue
into place on the roof.
And
that’s another one done.
The next one to do is Facade A3.


No comments:
Post a Comment