Right here we go with the next Facade in the new T004
Shops on a Slop kit from Scalescenes. This one is B2 and is the first of the
two wider shops in the kit. It’s the next one of choice in my line of shops.
Here we go.
The first step is to cut out both Facade 2 and 3. As you can see that there is quite a bit of detail in this kit, so a fresh sharp blade is called for and take your time. Take a marker pen and colour in the raw edges of the cut card.
|
|
|
|
|
|
|
|
|
Next, again with a nice sharp blade, cut out the Upper and
Lower window overlays. (Take you time!) Once cut out, colour the raw edges.
Having previously printed out the corresponding Glazing sheet,
carefully place the cut out overlays onto the Glazing sheet. Then cut out the
windows.
|
|
|
|
|
|
Glue the completed windows onto the corresponding Facade
and check they are central in the opening.
|
|
|
Next, cut out the Facade 1 and glue Facade 2 over the
top.
|
|
|
Next cut out the Upper Floor cover layer and the Upper
Floor Underside base layer and glue the cover layer over the base layer. Then
glue into place on the upper floor.
|
|
|
Next cut out and glue the two Roof Supports 3 back to
back. Take note of the slight curve in a couple of the edges.
|
|
|
After choosing and cutting out your Shop Overlay, glue
onto the bottom of Facade 1. Then squarely glue the Facade onto the shop back.
Then fit your choice of Shop sign.
|
|
|
Cut out and glue together the two Upper Side Internal
Walls back to back then glue into position on the upper side wall.
|
|
|
Next, cut out the Roof Supports 2a and Roof Support 2b and
glue into place along with Roof Support 3.
|
|
|
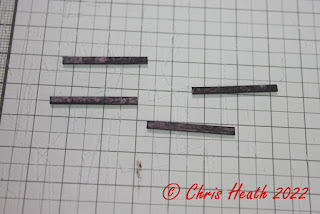
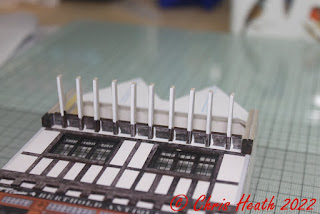
The start of the fiddly bit comes now. Cut out the Upper
Joists and colour the ends with a marker pen. Then glue the individual joists
into place under the upper floor. Then let the glue totally dry. Once dry, with
a fresh sharp blade, carefully cut off the excess white part of the Joists. The
use your marker pen to colour the raw edges.
|
|
|
|
|
|
Next cut out and glue into position the Roof Supports 1.
Once these are dry, squarely glue Facade 3 into place over the top.
|
|
|
Next cut out the Gutters and glue them into place on the
roof.
|
|
|
Cut out and glue the Bargeboard Supports into place next.
|
|
|
Next, cut out the four Roof sections and introduce a
slight curve into the two smaller sections. This will make it easier to glue
into place. Make sure that the roof sections are lined up with the edge of the
Bargeboards and glue into place.
|
|
|
Next, cut out and glue into place the Bargeboards 1 and 2.
|
|
|
Next, cut out and glue into place the Lower and Upper Side
Wall overlays into place.
|
|
|
Cut out the Corner Posts A,B and C next. Then glue into
place.
|
|
|
Next cut out the Plinth Base Layer and glue the Plinth Cover
Layer into place, but don’t wrap the stone edges yet. Glue the step into place.
Then glue into place on the facade and wrap the stone edges around the side.
|
|
|
Cut out and glue into two blocks of three, the Chimney
base layers. While the glue sets, cut out the Chimney cover layers. Once the
glue is dry, wrap the cover layers around their bases. Cut out the Chimney cap
Base and cover layers and wrap the cover layers around the base layers. Glue
on top of the chimneys.
|
|
|
|
|
|
And that’s it for the B2 Facade.
|
|
|
The next Façade
will be A2
Until Next Time…………


No comments:
Post a Comment