Tuesday, 1 December 2015

Shipping Containers…………..

Just to let you see what I’ve been up to. Whilst on my dinner breaks over the last couple of days, I’ve been knocking together a few of the T031 Shipping Containers from Scalescenes. They come in a variety of liveries in both 20ft and 40ft versions, with both standard box containers and refrigerator boxes. There’s even a couple of 30ft versions. They are very easy to knock up. Just a simple box with cover layers. Very effective, I think you’ll agree.

CIMG1519      CIMG1531

Just to make them a little more authentic, I straightened out a few paper clips to fashion some door locking rods. Simple, a very effective addition to any layout.

My workmate Andrew brought in a couple of trucks and a weighbridge for authenticity.

CIMG1529      CIMG1530

CIMG1534

Oh! Don’t forget about the Scalescene Gift Certificates. Perfect for that “I don’t know what I want for a Christmas present” problem.

Until Next Time………………

Chris sig

Saturday, 21 November 2015

Goods Shed………….

The next project I’m having a go at is, the R009 Goods Shed in brown brick from Scalescenes. It’s an old one released back in 2008. I don’t know how I’ve missed it until now. It’s a simple box build, but with all of the detail I’ve come to expect from Scalescenes. Before I show my progress, I have a new laptop and I’m using new editing software for my pictures, so apologies if the quality isn’t quite there yet. It’s quite a learning curve. Right back to the build. First the gable ends. They consist of  sturdy external and internal base layers cut from 2mm grey board and cover layers, which I print onto A4 self adhesive labels.
IMG_2706      IMG_2707
A little tip for when you have to score a fold. Cut out all of the piece apart from the fold marks. Put a small cut at the fold mark, flip it over and fold along the cut marks.
IMG_2708      IMG_2709
It’s at this stage I like to colour any hard to access raw edges. It’s a lot easier now than later.
IMG_2713      IMG_2716
Repeated for the internal gable.
IMG_2717
The sides come next. They come together just the same as the gables.
IMG_2718
The windows are put into place at this stage. I can’t print OHP on my laser printer, so I have to use an inkjet to print any windows. The detail on these windows are brilliant. These get sandwiched between the internal and external layers.
IMG_2721      IMG_2725
That’s where I’m up to now. Still plenty more to do. Call back soon to see where I get to.
Oh! before I go, don’t forget the new Scalescenes Gift Certificates. Perfect for that ideal Christmas present.
Until next time………….
Chris sig

Saturday, 7 November 2015

Canal Lock………………

I just wanted to show you the T018 Canal Lock from Scalescenes that goes along with the Narrow Boat I posted last week. The plan was to build the kit at home and plot its progress via my blog. Well I forgot to bring the kit back home from work, as I built the narrow boat last weekend whilst at work. So as I sat at my desk during the week, it was screaming out to me to be built. Well before I knew it, it was done. Unfortunately I had no camera with me, so no pictures of the build, but I managed to get some once it was finished. Before I finished it, I had a little play with trying to make some water with PVA glue. It was the simplest thing to do. A little leap of faith at first, as you have to cover your work with glue and just hope it’s going to dry.

2015-11-06 10.37.34      2015-11-06 10.37.44

I have to say, I was so pleased with the results.

CIMG1503      CIMG1501

As the glue was drying, I agitated the section that was leaving the lock. The result was fantastic.

CIMG1500     

Before I go, if you are stuck for a present for someone who is hard to buy for, the new Scalescenes website has gift certificates available. They are for any amount you want. For any modeller who is hard to buy for, these are ideal.

Until Next Time………….

Chris sig

Sunday, 1 November 2015

A Quick Narrow Boat………..

Well I got back off of holiday this week and back to work, and to rub salt into a very raw wound, I had to work all weekend too. Never mind though, I had lots of spare time both days. So took myself a Scalescenes kit to play with. I took the T018 Narrow Boats and Lock. I’m sorry I don’t have pictures of the build and the camera I used is not the best, but here is my attempt at a Narrow Boat.

CIMG1462      CIMG1464CIMG1465CIMG1466CIMG1467CIMG1469

Very easy to build and there is six to choose from. I’ve made just the one for now, as I was supposed to be working. I intend to build the Lock the next weekend I’m at work. But thankfully that’s a month away. I will take pictures of the lock when it’s done.

Until Next Time……….

Chris sig

Sunday, 4 October 2015

Hornby Magazine Bus Depot…………….

Well I’ve been stuck at work all weekend with not much to do other than wait for wagons to return to load. So I’d bought myself the October edition of the Hornby magazine during the week, which comes with a free build from Scalescenes, a bus depot. The part that comes with the magazine is the front facade, and you can download the main building from the scalescenes website free of charge. It’s a very simple build, even for beginners. Lots of fine but very achievable detail. So I downloaded the kit pack my knives, glue, ruler and card then head off to work. I’m sorry I didn’t take any photo’s of the building stages, but to be fair, I was supposed to be working. It has taken me two days to finish this kit between weighing wagons, so this could be a realistic starter project for any beginner. So go on, get yourself out and grab a copy of the October Hornby Magazine, download the kit and enjoy yourself. Apologies for the quality of the pictures, but the lighting and the camera I had at my disposal were not the best. Here it is in all of its glory.

CIMG1452      CIMG1453

CIMG1454      CIMG1455

CIMG1456      CIMG1457

CIMG1458      CIMG1459

CIMG1461

Until Next Time…………..

Chris sig

Monday, 28 September 2015

Cargo Ship Revisited Pt4…………….

I've finally finished the T030 Cargo Ship from Scalescenes . I've had to put it onto the back burner for a short while, as I've recently lost my Father. Modelling was the last thing on my mind whilst he was so ill. He’s in a better place now and out of all of his dreadful pain and things are slowly returning to normal.

Anyway back to the ship. I left showing you the hatches I'd fashioned from some mounting board wrapped in a green cover layer. That left me with a dilemma, do I leave the modified hold white or do I change it to green to match the ship. I decided to go with the green, so I used my hand held airbrush with my Promarker alcohol pens. I was very pleased with the result. 

IMG_2219      IMG_2227

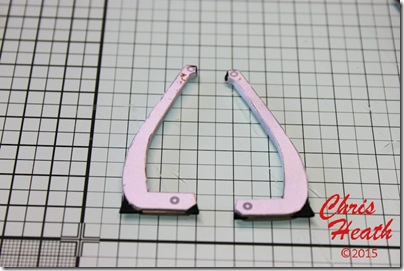
All that was left to do was all of the little fiddly details. Some steps for access to the aft and fore decks. A length of fine florists wire makes an ideal handrail.

IMG_2669      IMG_2671

IMG_2672      IMG_2673

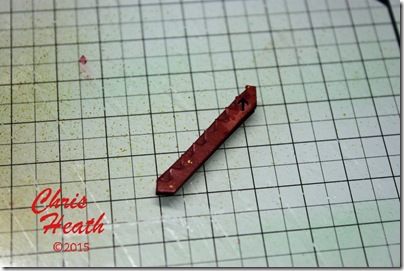
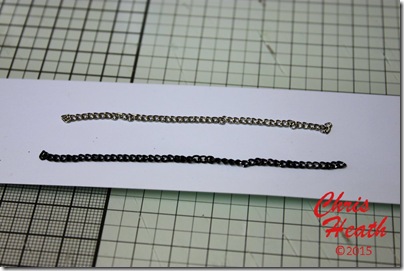
Then the winch on the fore deck. Cleverly made with the addition of a couple of push pins fashioned for the drums. A trip to the local pound shop for a cheap chain necklace to make an anchor chain. A quick coat of black paint and you have an ideal anchor chain.

IMG_2678      IMG_2679

IMG_2681      IMG_2680

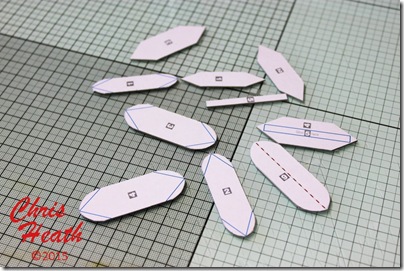
On the original ship design, it comes with two life boats on the aft deck. The problem I had was, when I chopped off the stern it left me with very little room for the life boats, so I had to improvise. One would have to do. Very clever, but simple design makes a perfect life boat.
IMG_2682      IMG_2683

IMG_2685      IMG_2689

IMG_2690      IMG_2691

I was stuck to what cargo to put in the hold. I thought of coal, sand and even steel coils, but I opted for a cargo of urea. This product gets shipped into our port in this shipping companies vessels. I couldn't use actual urea as it is a hygroscopic substance. Not good when your model is made entirely of card. I would end up with a soggy mess. My wife Jak had a pack of a product called Artista Super Light, it is a moist paper based modelling product which is easily fashioned into shape, and once it's air dried, it's ideal as a bulk lightweight cargo.

IMG_2693     

And here it is in all of its glory. As my attempt at a bit of a kit bash, I'm quite pleased with my effort.


The gantry crane that moves the hatches, was kindly made for me by a work colleague Andrew. He is a very good scratch builder (as you can see) and he made this out of strips of Evergreen plastic. And it is very accurate to the original crane. He took photos from a sister ship in the port.

Until Next Time………

Chris sig